
Create a form and add it to a page
Build a contact form with name, email, subject, and message fields, then embed it on a page. When you finish, visitors can submit the form and the message arrives in your inbox.
What you'll need
- A Backend account with access to Components → Forms and to Page Management.
- An email address that should receive submissions.
- 10 minutes.
1. Open the Forms module
Click Components → Forms in the sidebar. The list of existing forms opens.
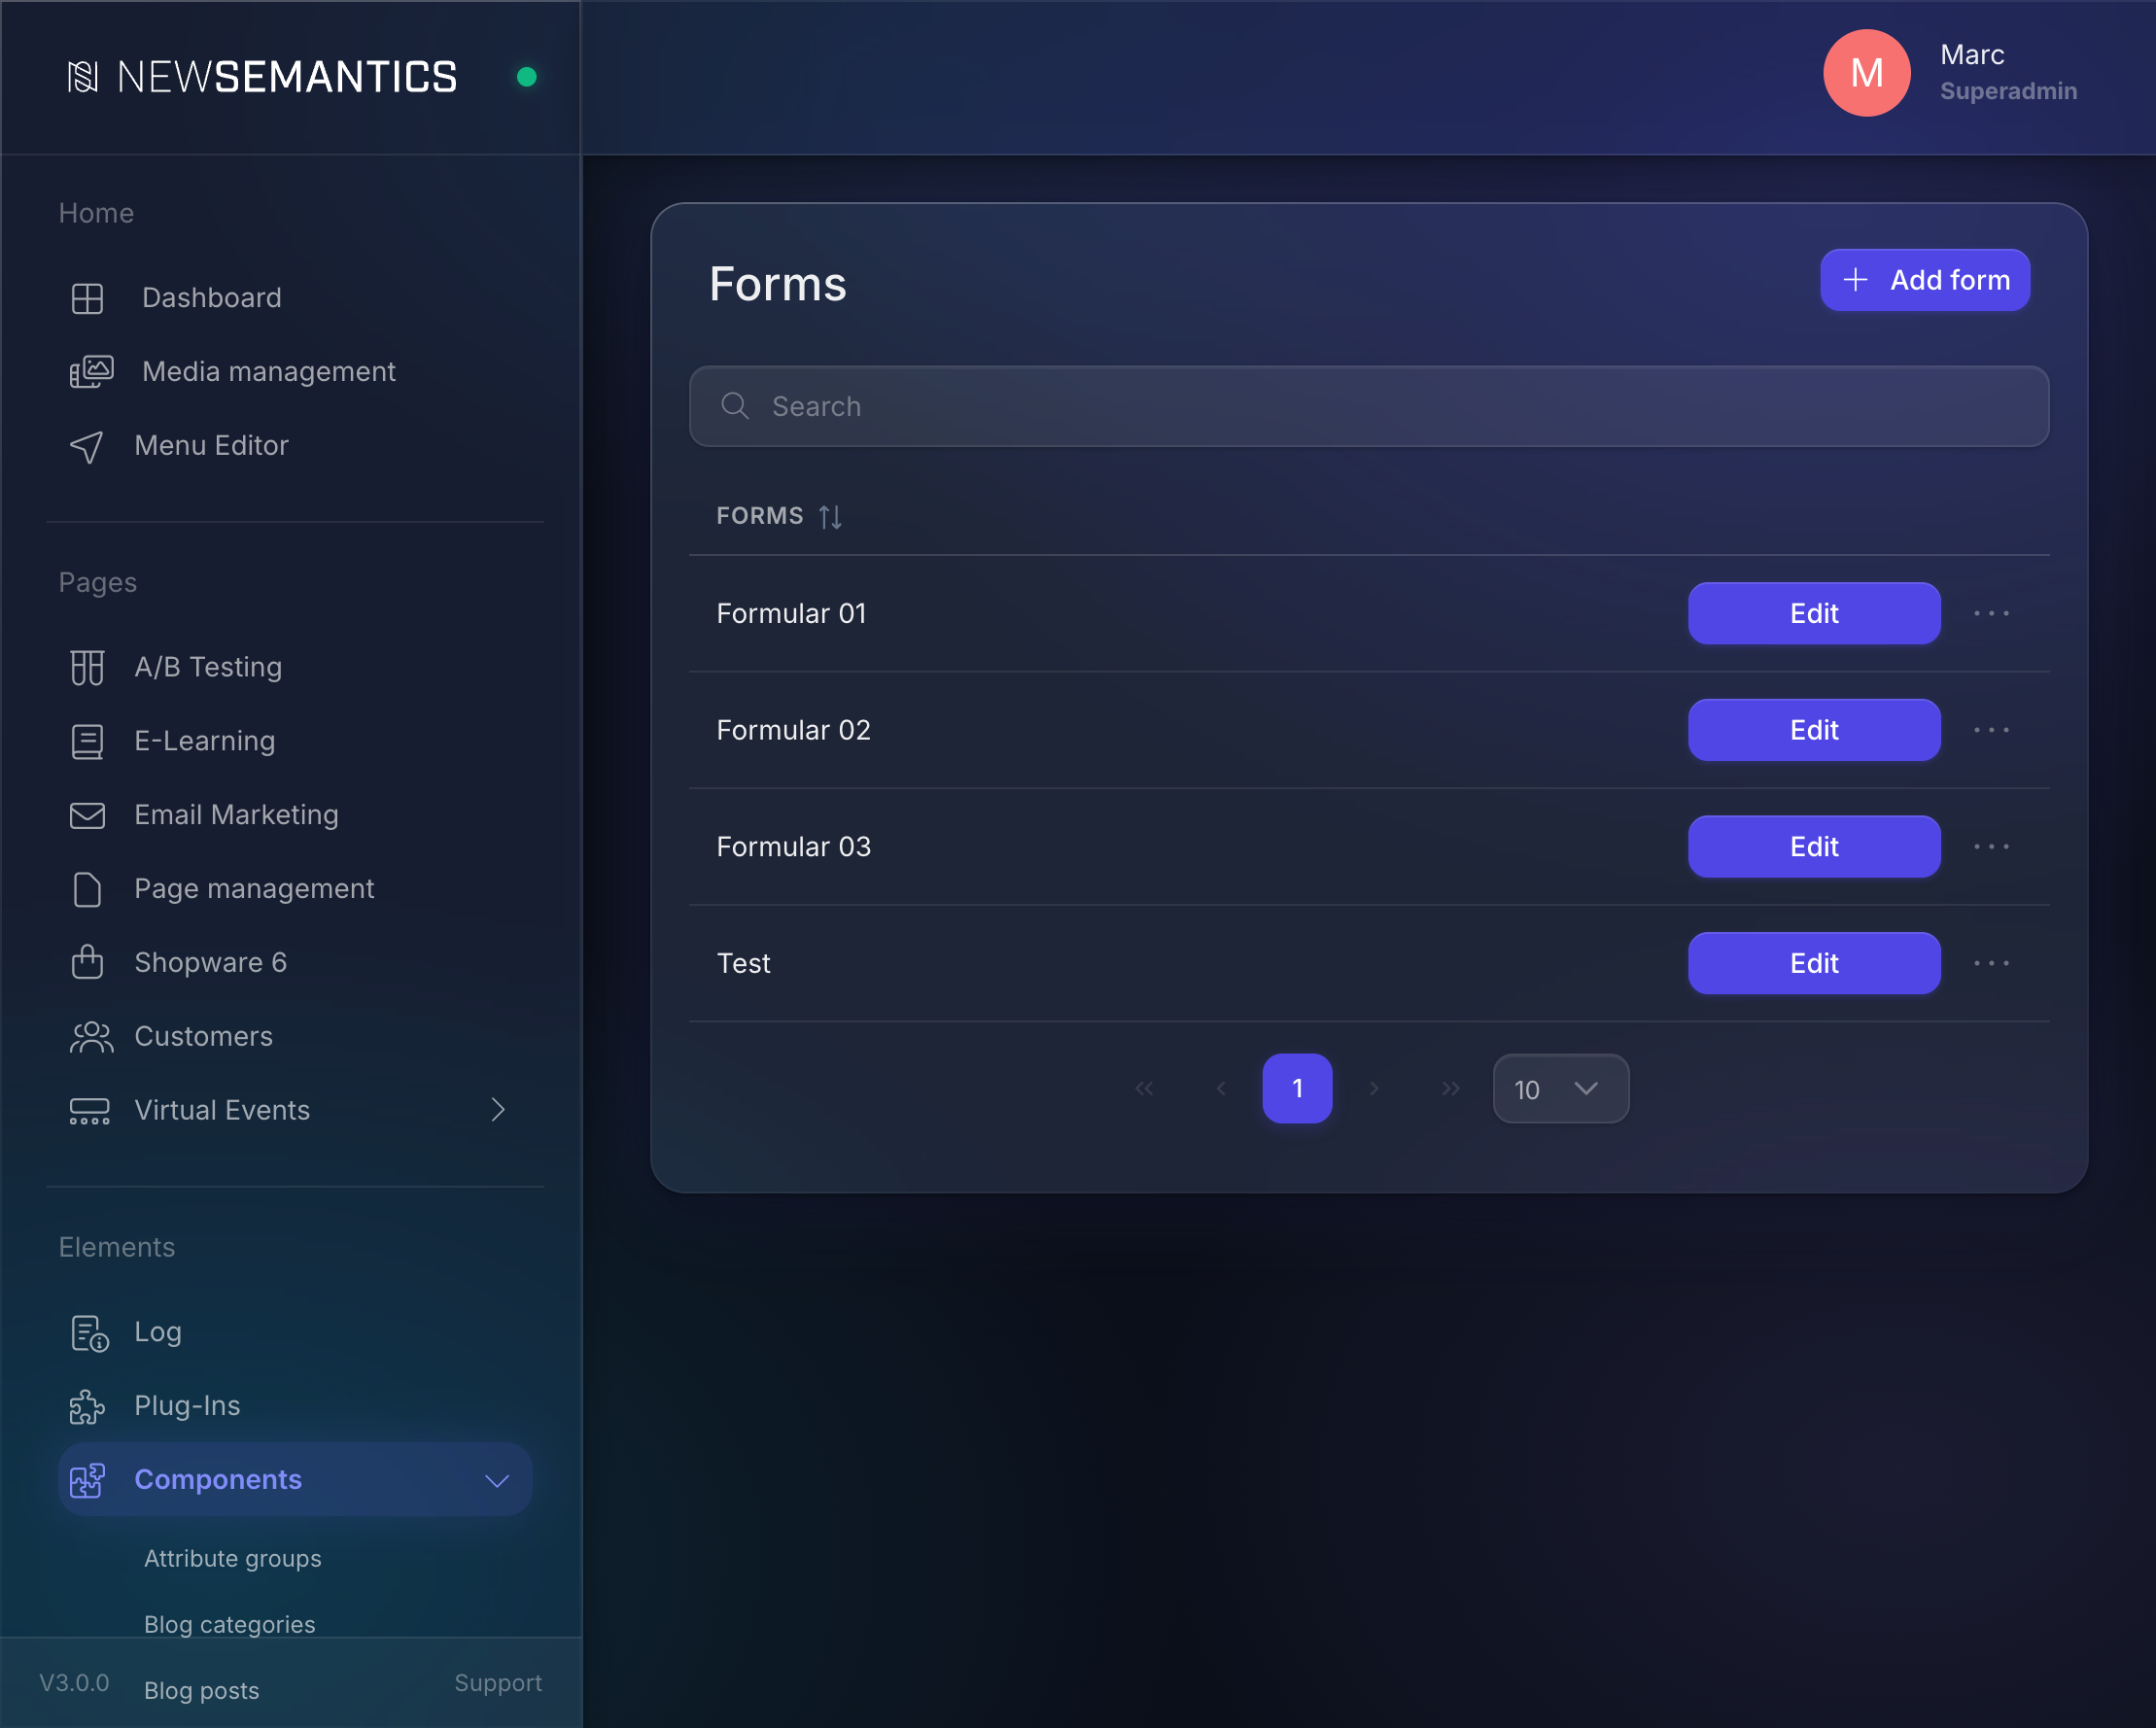
2. Add a new form
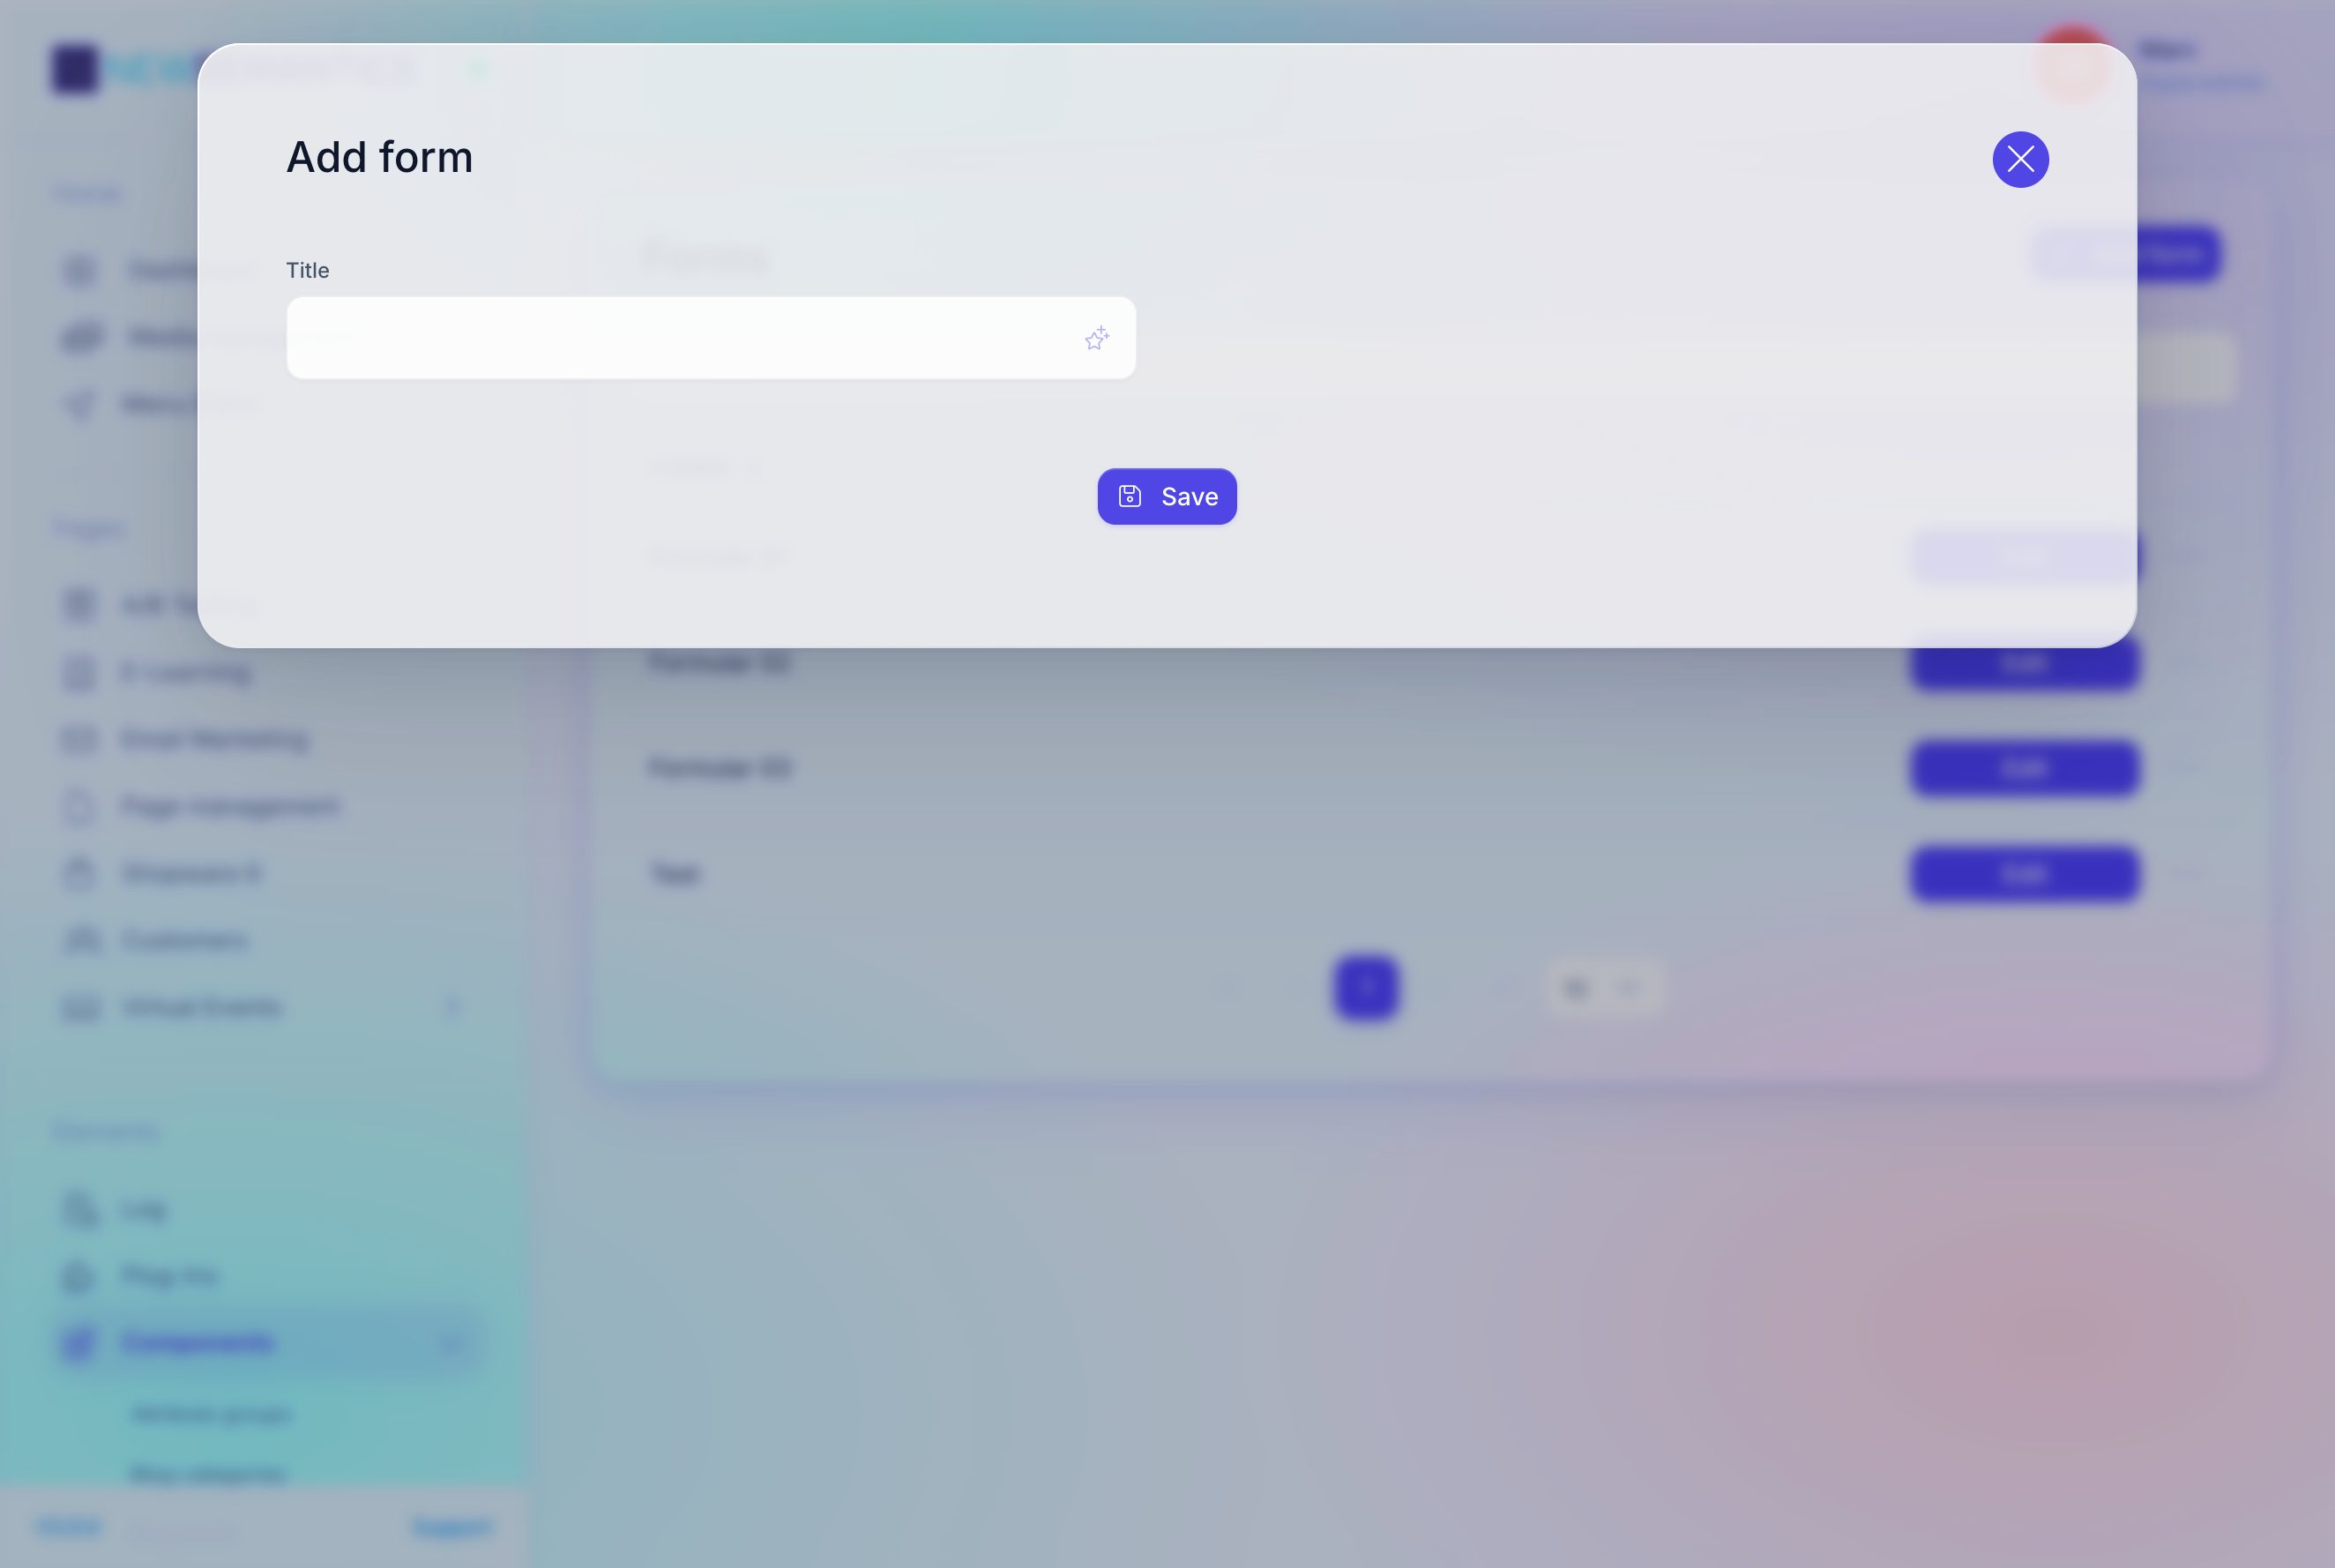
Click Add form in the top right. A modal opens with two fields:
- Title — the form's internal label (e.g.
Contact form). - Receiver E-Mail — the address submissions are sent to (e.g.
[email protected]).
Fill both and click Save. The new form appears in the list.
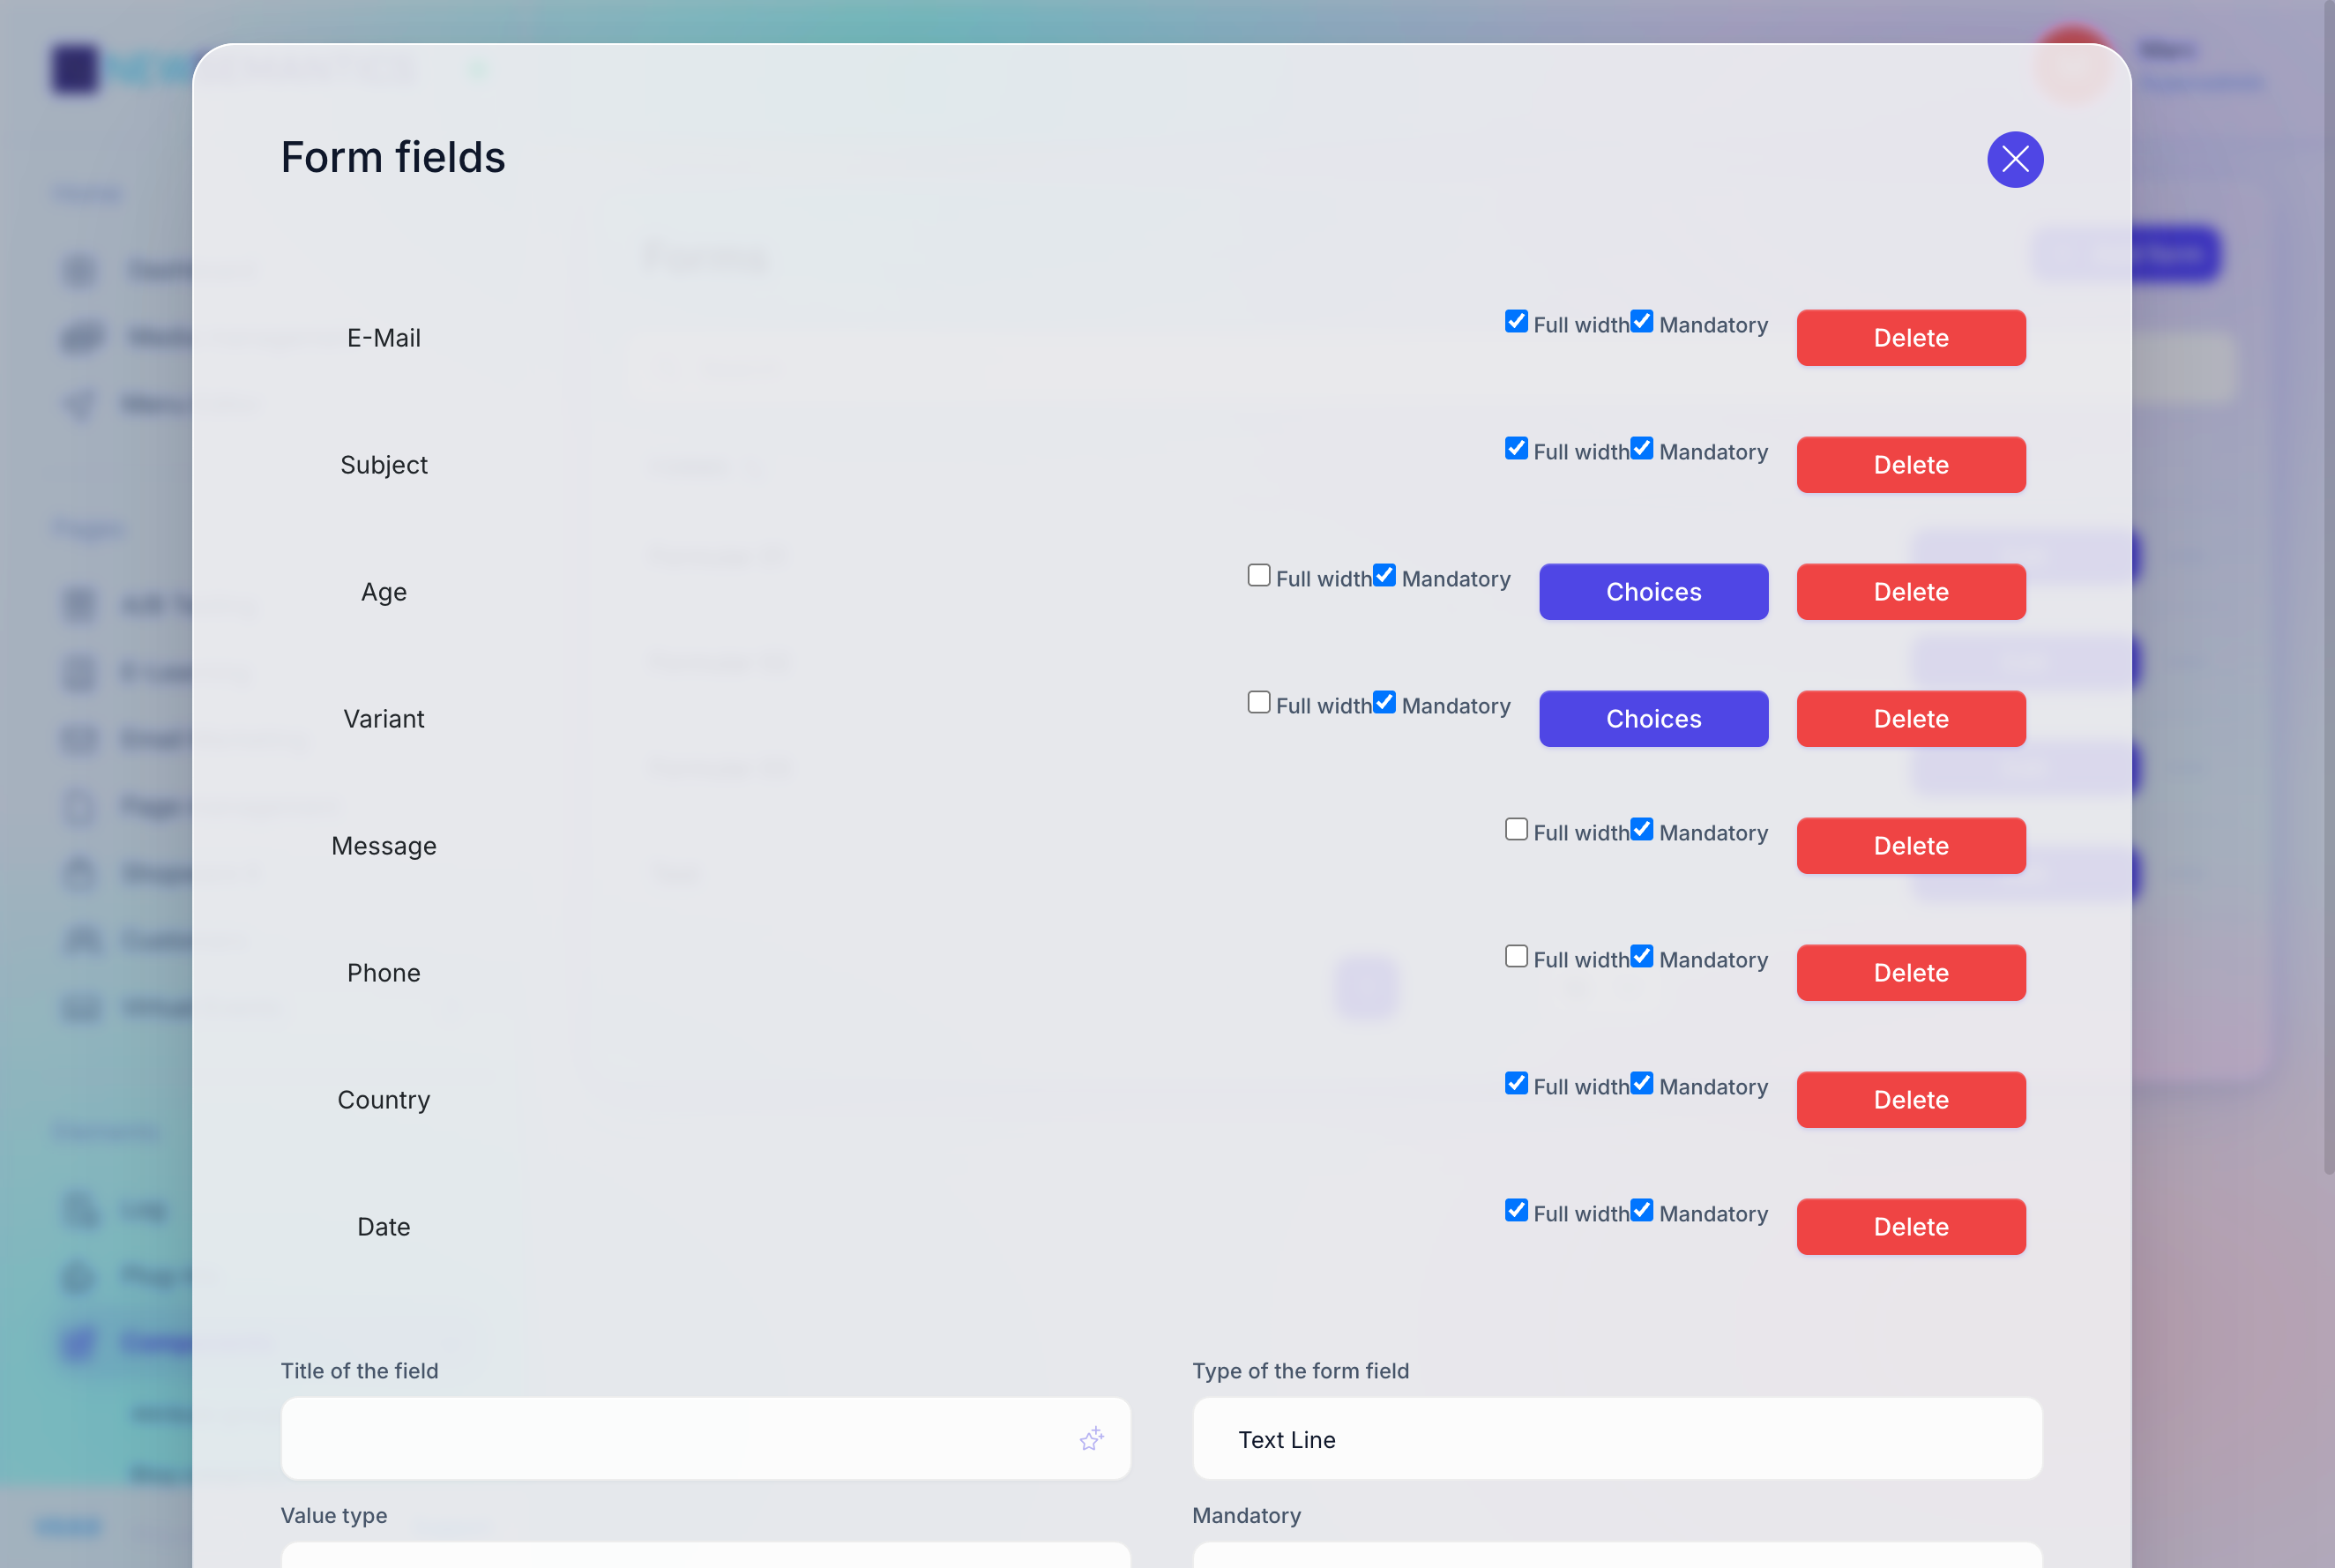
3. Open the form's field editor
In the Forms list, click the Form fields button on your new form. The fields panel opens, empty.
4. Add the Name field
Click Add at the top of the fields panel. A modal asks for:
- Title of the field —
Name. - Type of the form field —
Text Line. - Value type —
Name. - Mandatory —
Mandatory. - Width —
Half width.
Click Save. The field appears in the panel.
5. Add the Email field
Click Add again. Fill:
- Title:
Email. - Type:
Text Line. - Value type:
E-Mail. - Mandatory:
Mandatory. - Width:
Half width.
Click Save. Having exactly one field marked as E-Mail ensures the Reply-To header in the submission email is correct.
6. Add the Subject field
- Title:
Subject. - Type:
Text Line. - Value type:
Subject. - Mandatory:
Optional. - Width:
Full width.
Click Save.
7. Add the Message field
- Title:
Message. - Type:
Textarea. - Value type:
Custom. - Mandatory:
Mandatory. - Width:
Full width.
Click Save.
8. Add a consent checkbox
Click Add. Fill:
- Title:
I agree to the processing of my data. - Type:
Checkbox. - Value type:
Custom. - Mandatory:
Mandatory. - Width:
Full width.
Click Save. The checkbox gets a Values sub-button; leave it empty — a single checkbox needs no options.
Consent is your responsibility
The CMS does not auto-generate consent text. Write what your legal team approved. Link to your privacy policy in the checkbox title if the audience is regulated.
9. Open a page in the Pagebuilder
Navigate to Page Management, pick the page where the form should appear (e.g. Contact), and click Build page. The Pagebuilder opens.
10. Drop the Form Widget
In the Pagebuilder sidebar, find the Form Widget. Drag it into a column on the page, or click the + in an empty column and pick Form from the Widget Picker.
11. Select your form
The Widget's Properties Panel appears on the right with one field:
- Form — a dropdown of every form in the CMS.
Pick Contact form. Click Save in the Properties Panel.
12. Publish the page
Click Publish in the top bar of the Pagebuilder, then choose Publish now. The page goes live.
13. Test the submission
Open the public page in a private browser window. Fill the form with a test entry and submit. The submission email arrives at the Receiver E-Mail address with:
Fromset to the site's system sender (configured in Settings).Reply-Toset to the value you typed in the Email field.- Subject set to the value you typed in the Subject field.
- Body carrying the Name, Message, and consent values as plain text.
What you've learned
- How to create a form and set its recipient.
- How field Value types shape the submission email.
- How to mark fields as mandatory and half-width.
- How to drop the Form Widget on a page and pick your form.
- How to verify delivery with a test submission.
Next up
- Media Manager — add a brochure download next to the form.
- Pages & Pagebuilder — finalize the rest of the contact page.
See also
- Forms overview — field types, value types, permissions.
- Email Marketing — newsletter subscription forms with provider integration.