
Virtual Exhibition
The Exhibition module runs virtual rooms for online events: 2D map rooms, immersive 3D worlds, and 360-degree panorama rooms. Visitors walk between booths, click hotspots, watch videos, download material, or join live Q&A sessions.
Because the module touches 3D models, cameras, lights, and interactive elements, it is the most technical of the marketing tools. Editors set up rooms and elements; a designer or developer usually prepares the 3D assets.
Where the module lives
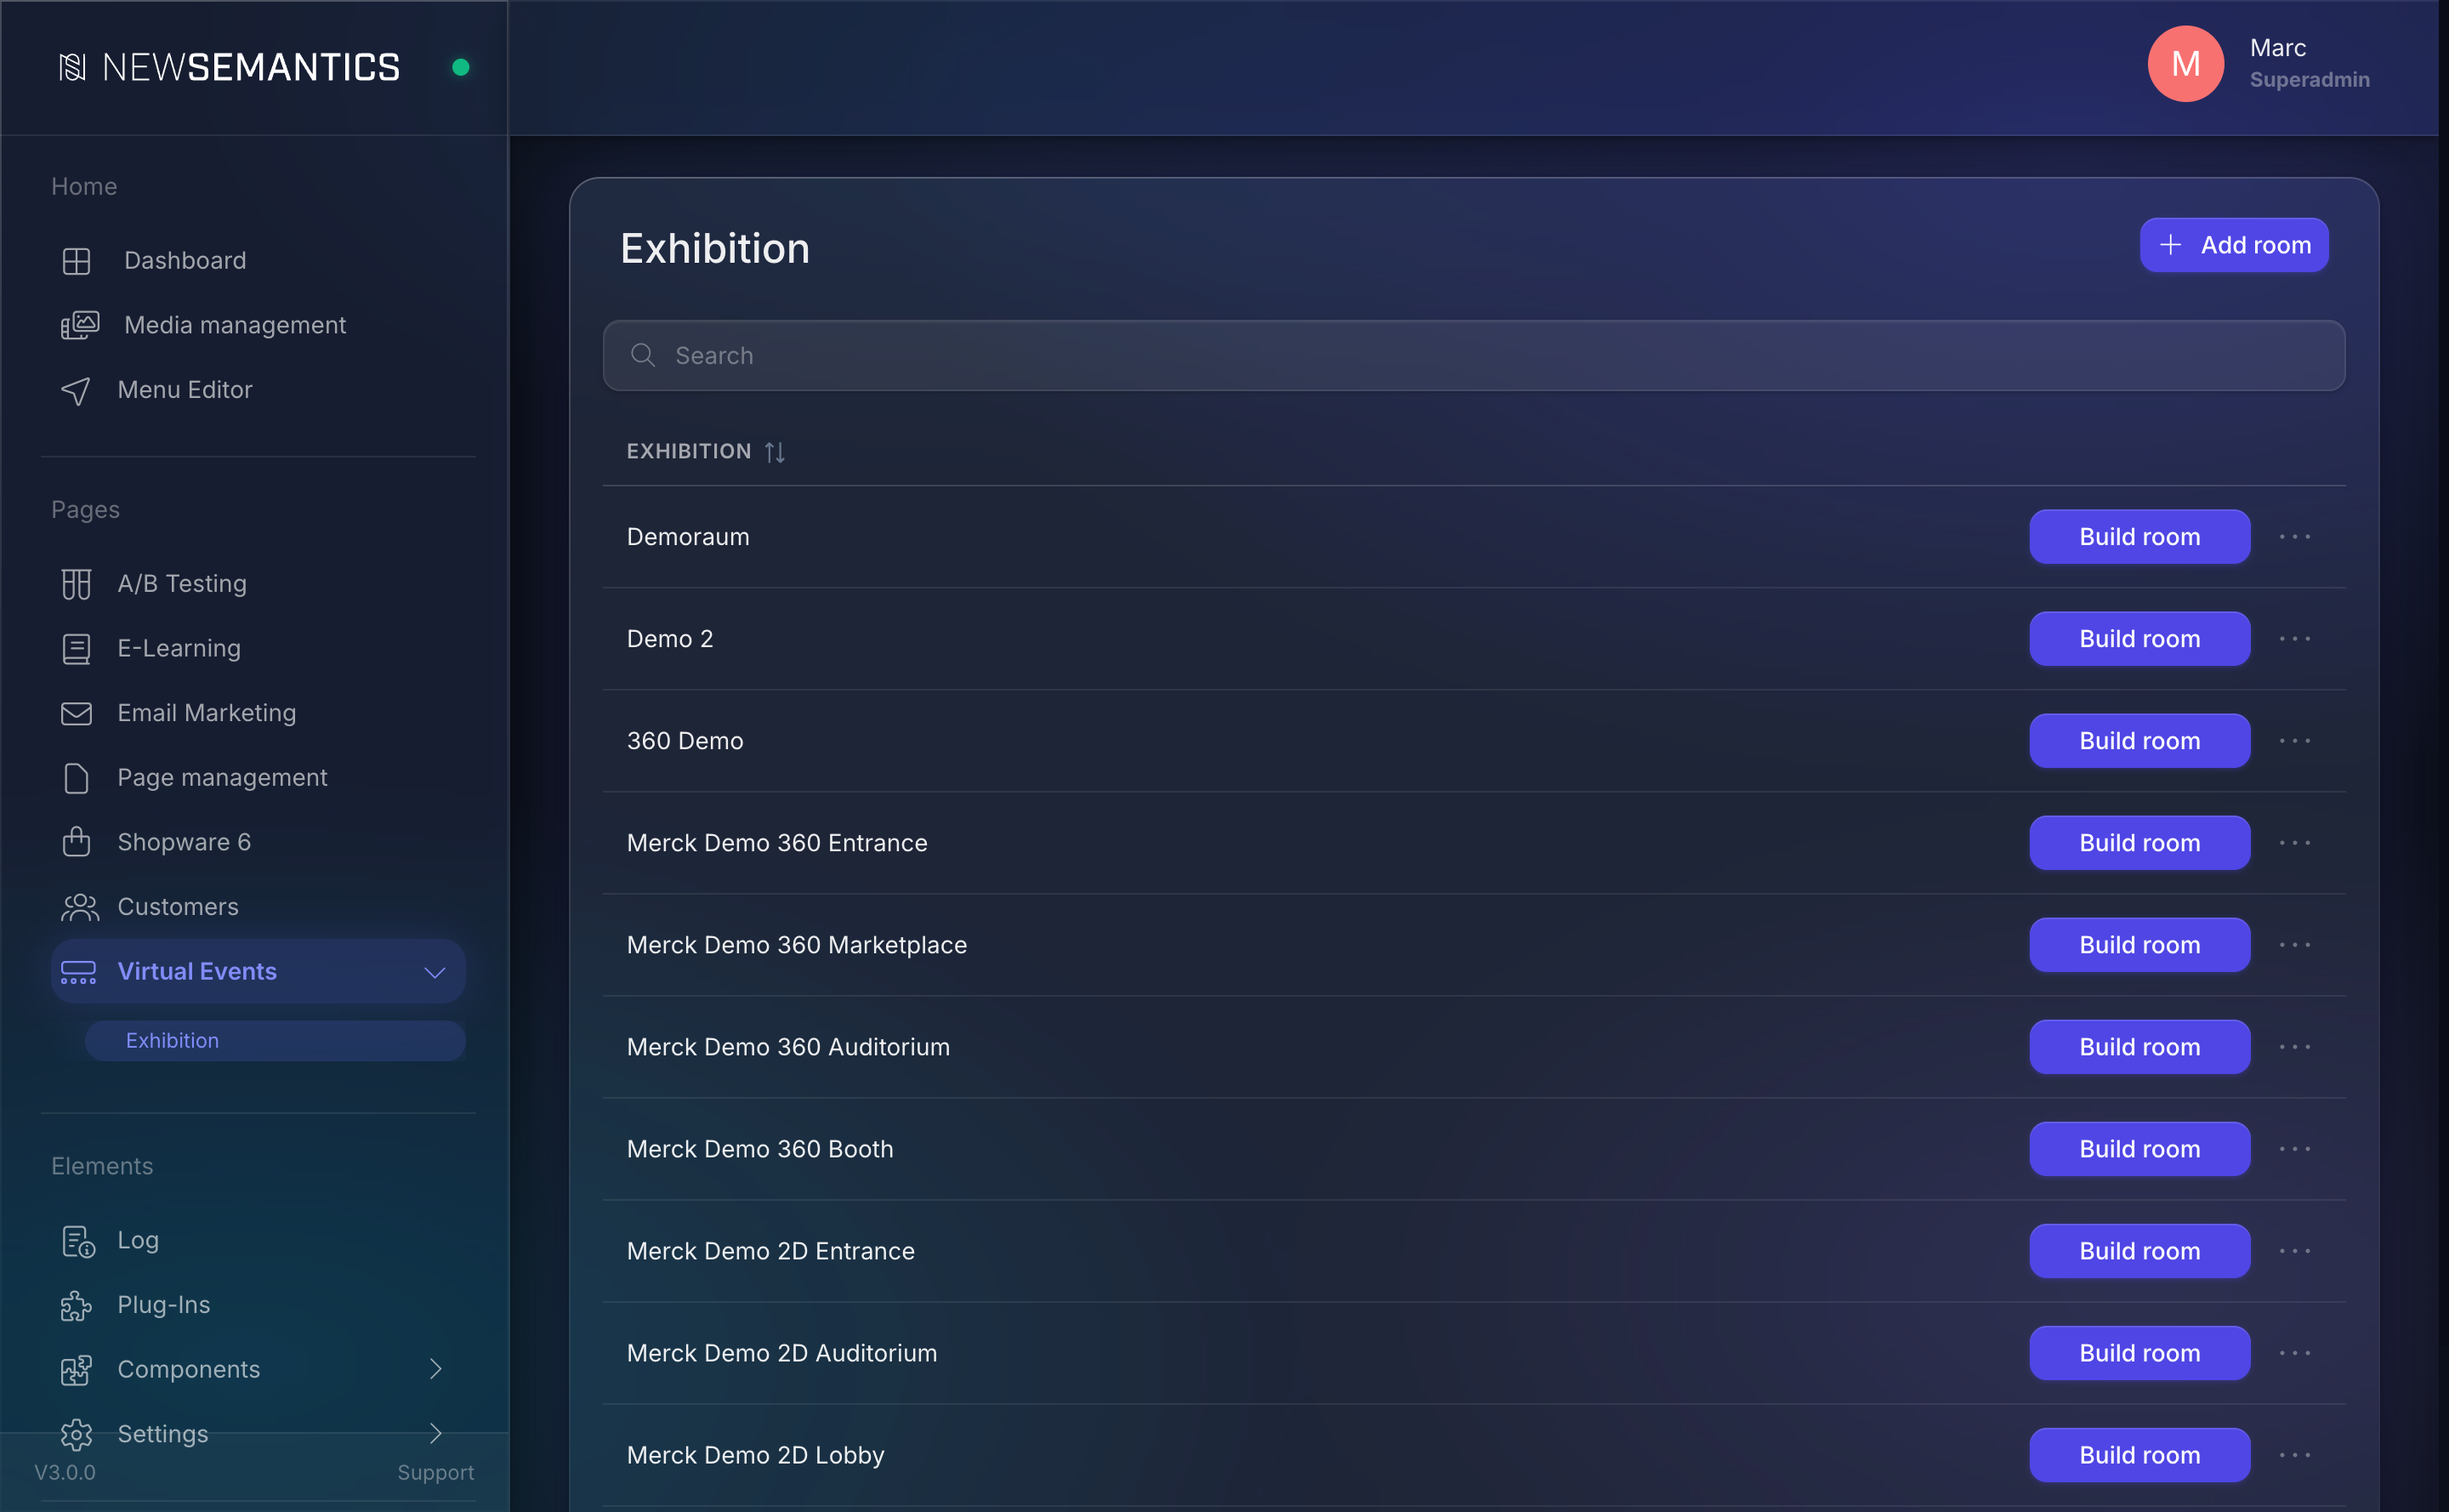
Open Virtual Events → Exhibition in the sidebar. You see two entries:
- Exhibition — the list of rooms.
- Exhibition masterdata — global configuration: base URL, default room, login requirement, intro video.
1. Configure masterdata
Open Exhibition masterdata first. Fill in the one-time settings.
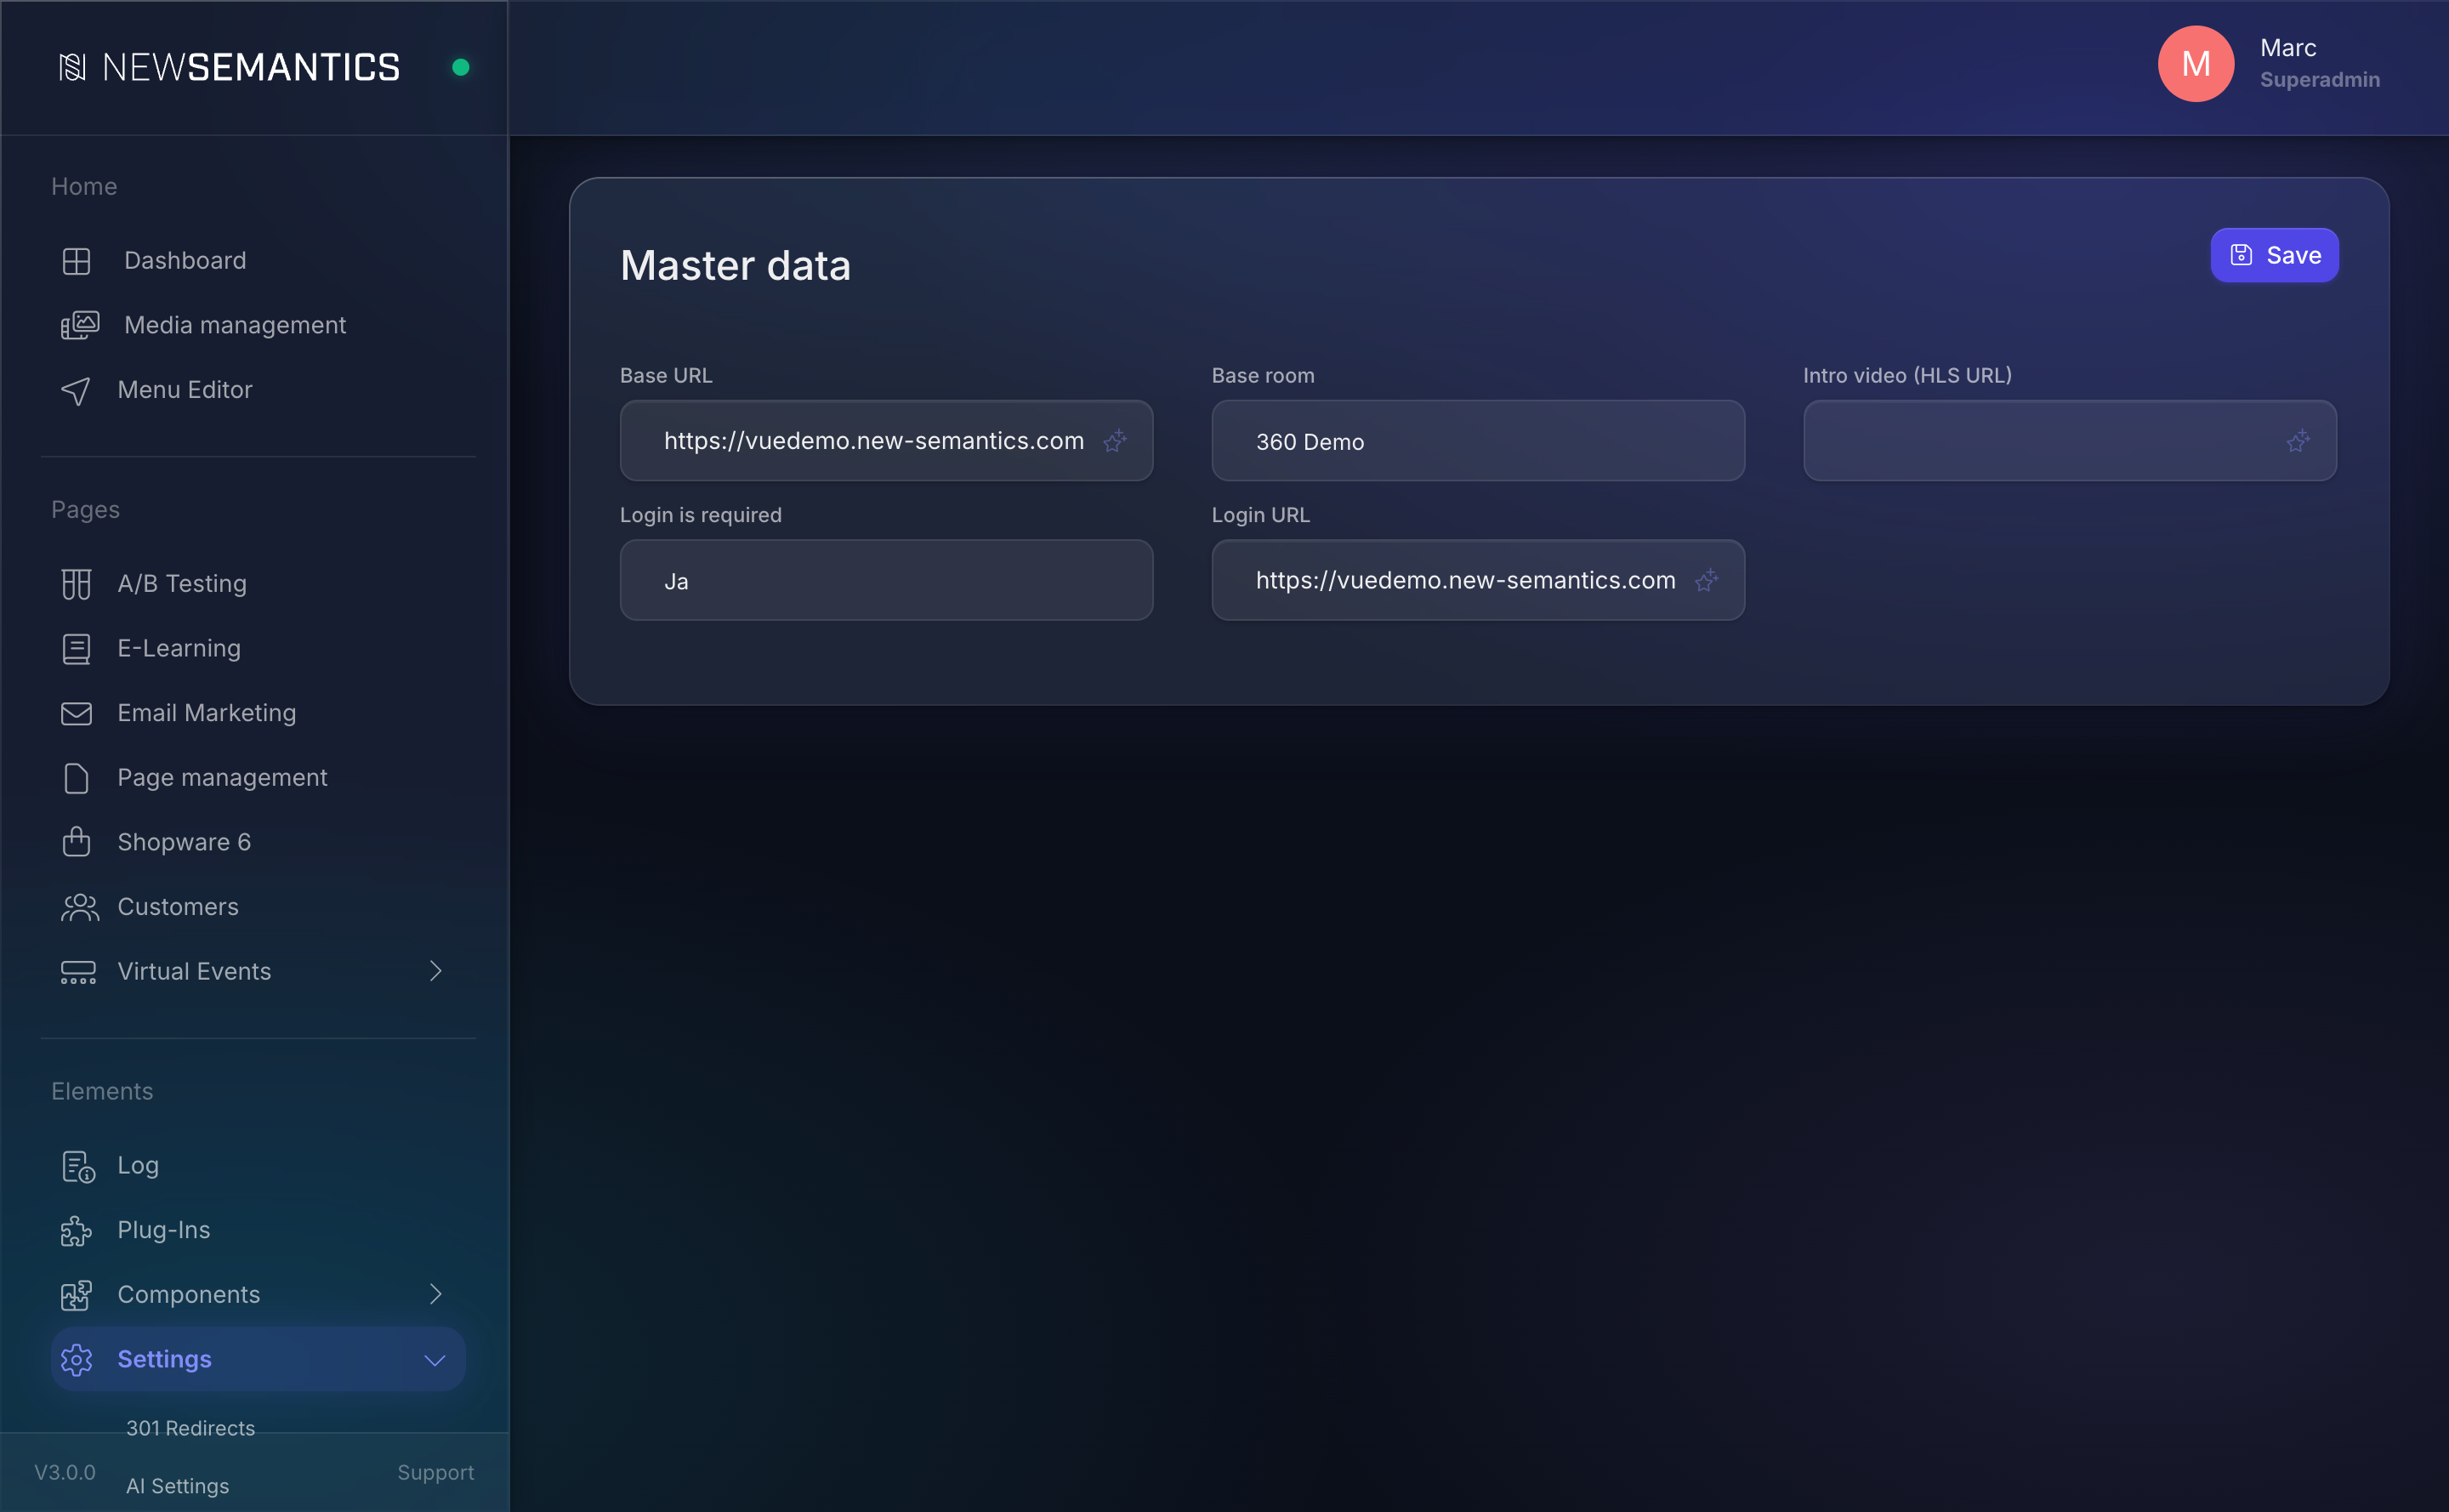
| Field | Purpose |
|---|---|
| Base URL | Public URL under which the exhibition lives, e.g. https://events.example.com. |
| Base room | The room a visitor lands in first. |
| Intro video (HLS URL) | Optional welcome video played before the first room loads. |
| Login is required | Restrict access to logged-in users (Yes/No). |
| Login URL | Where to send visitors who need to log in. |
Click Save.
2. Create a room
Back on Exhibition, click Add room in the top-right.
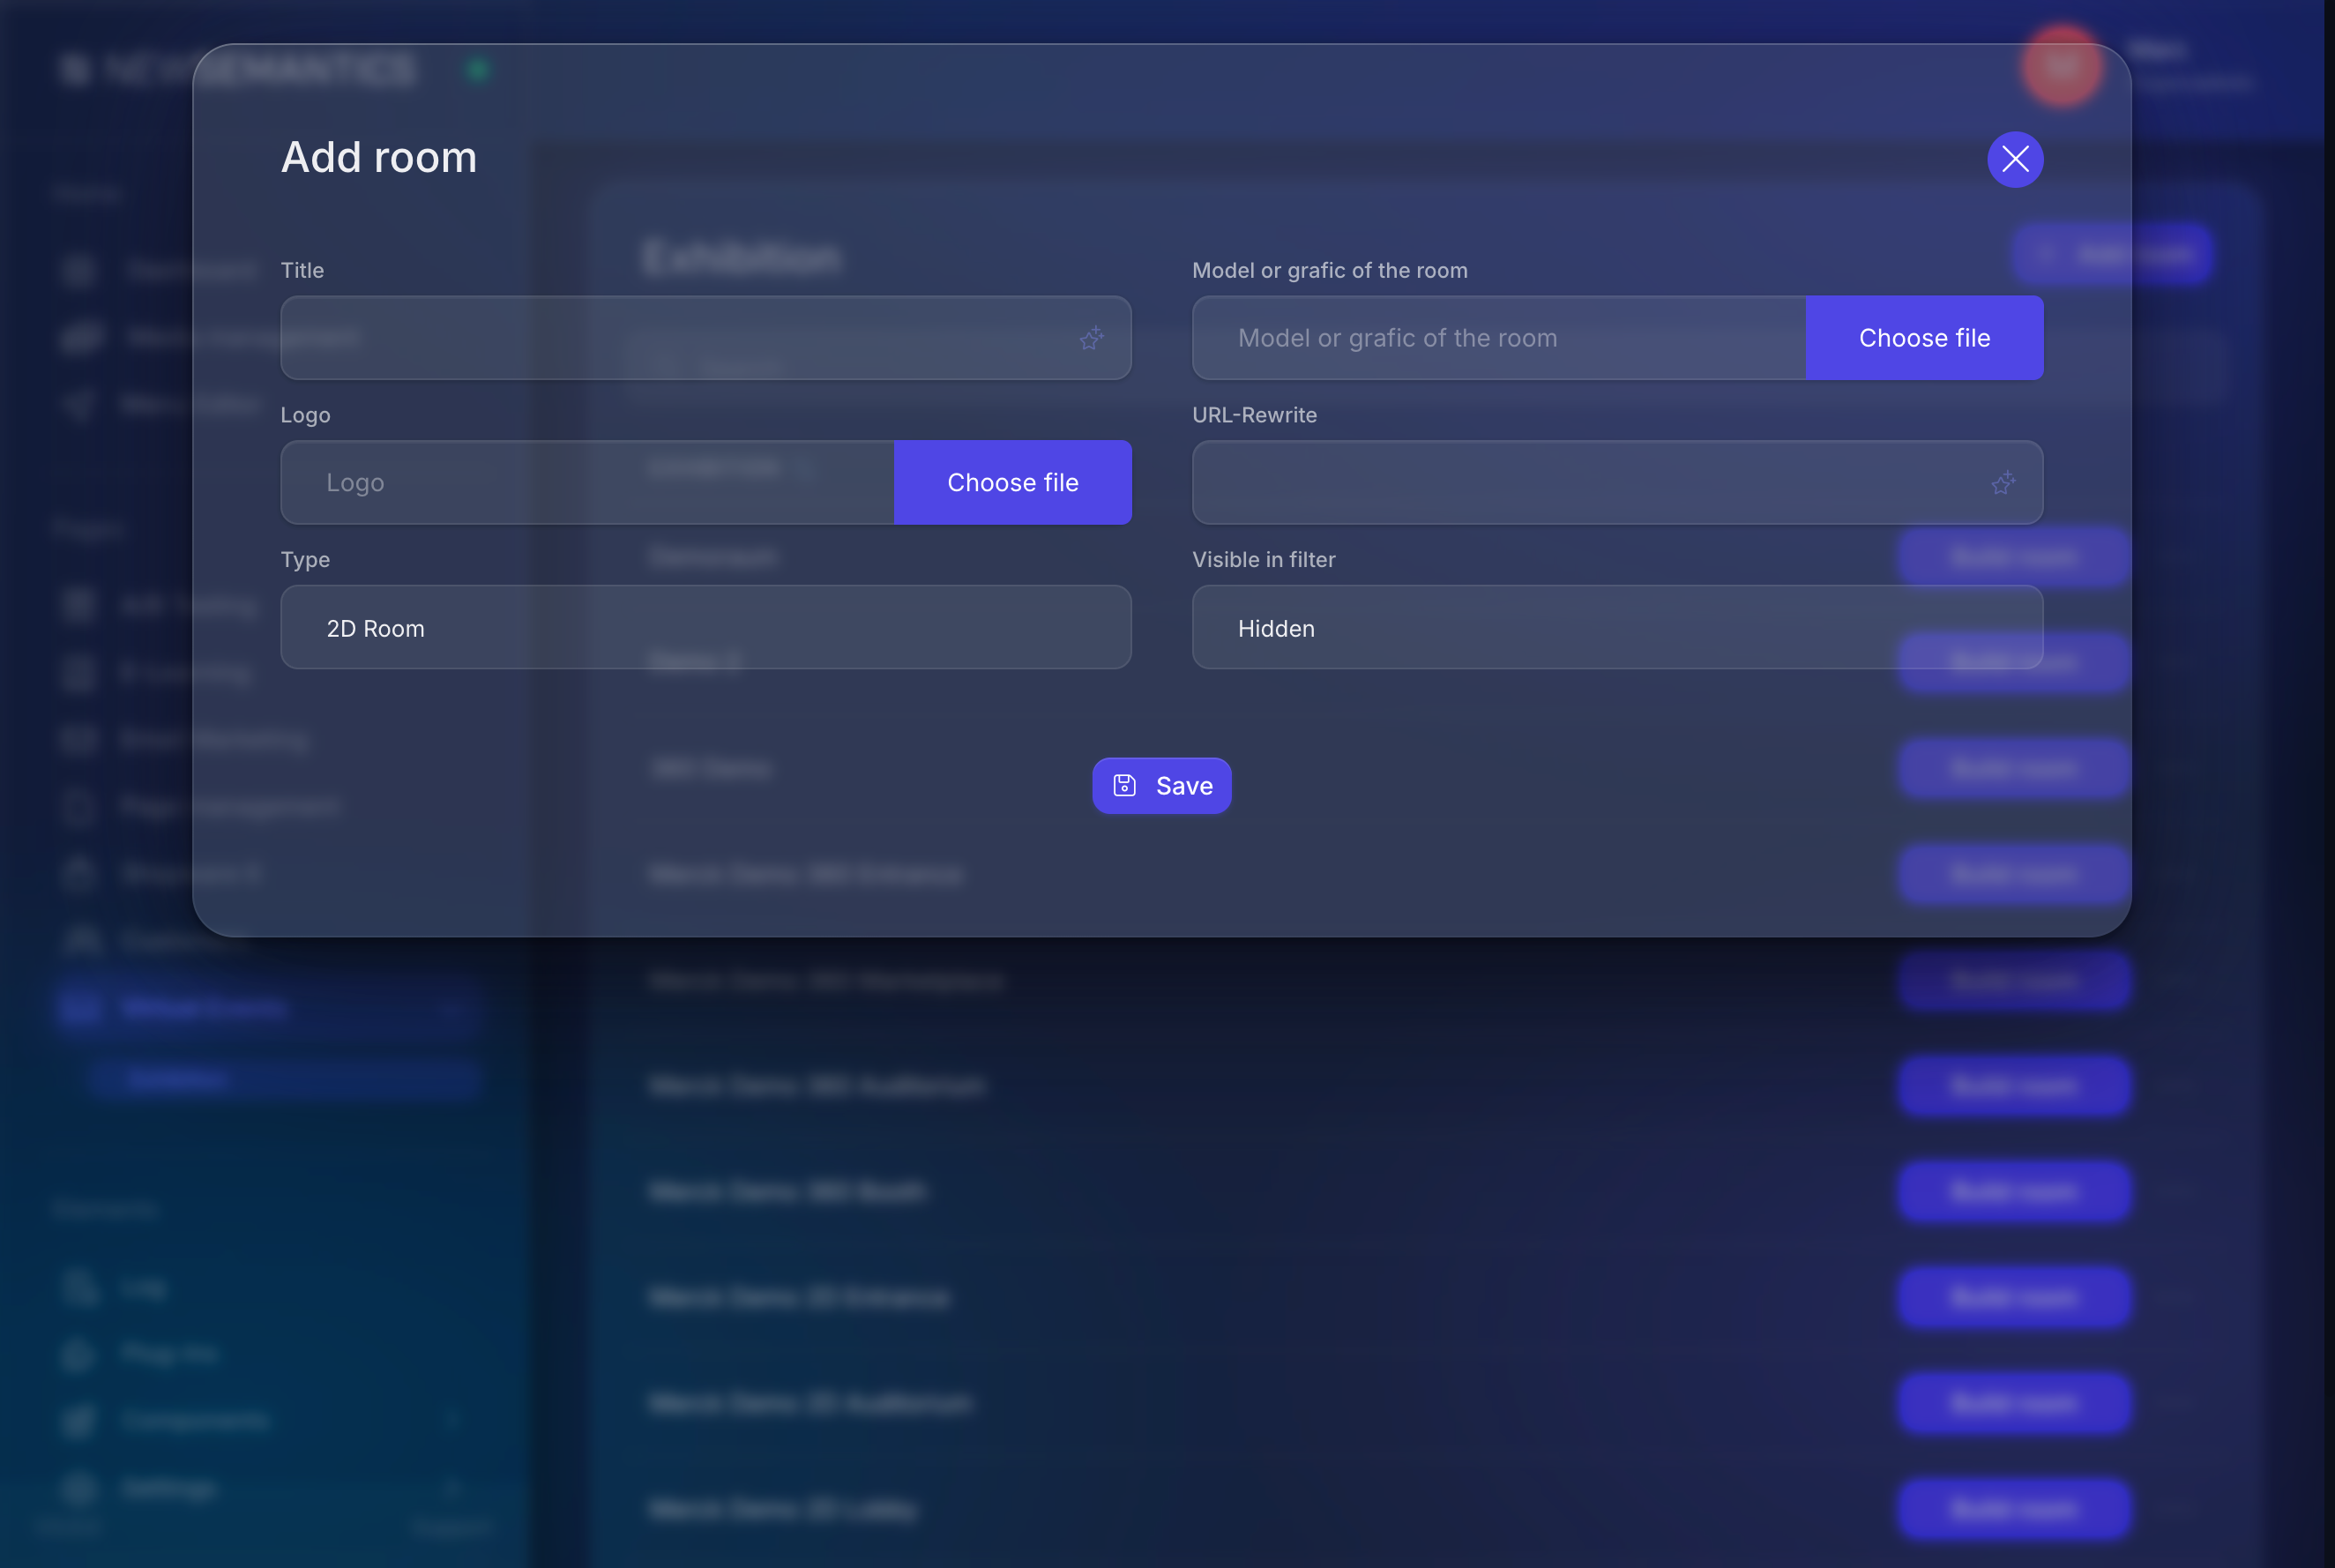
| Field | Purpose |
|---|---|
| Title | Room name shown in filters and the room list. |
| 3D model (FBX) or 2D graphic | The room's geometry. FBX/GLTF for 3D rooms; PNG/JPG for 2D; equirectangular JPG for 360. |
| Logo | Optional booth logo shown in the navigation bar inside the room. |
| URL rewrite | Public slug, e.g. /exhibition/hall-a. |
| Type | 2D Room, 3D Room, or 360 Room. |
| Visible in filter | Hidden rooms exist but are not offered to visitors. |
Click Save. The room appears in the list.
3. Build the room
In the room row click Build room. The room builder opens — a 3D scene preview on the left, a properties panel on the right.
Depending on the room's type you configure different groups of settings:
Model (3D rooms)
| Field | Purpose |
|---|---|
| Position X/Y/Z | Where the model sits in world space. |
| Scale X/Y/Z | Model scaling. |
| Rotation X/Y/Z | Rotation in degrees. |
| Limit one / Limit two | Optional walking boundaries. |
Camera
| Field | Purpose |
|---|---|
| Position X/Y/Z | Starting camera position. |
| Target X/Y/Z | Look-at point. |
Lights
Hemisphere light for ambient tone and directional light for highlights. Set position, intensity, and color per light.
Water and sky (outdoor scenes)
Optional Three.js Water and Sky shaders. Toggle on and adjust the turbidity, sun elevation, and distortion sliders to taste.
Player avatar
Optional third-person avatar that follows the visitor. Upload a model and set scale and starting rotation.
4. Add elements to a room
Elements are the interactive hotspots inside a room: links, downloads, video portals, agenda boards, Q&A rooms. On the room builder open the Elements tab and click Add element.
| Type | What it does |
|---|---|
| Link | Jumps to an external URL when clicked. |
| Download | Downloads a file. |
| Download List | Shows a list of files in a modal. |
| Eventlocation | Warps the visitor to another exhibition room. |
| Videoroom | Warps to a video-product page (uses a Shop product with type=2). |
| Video | Plays an HLS video in a modal. |
| Q&A Sessions | Opens a live Q&A interface. |
| Real Time Video Chat | Opens a live video chat room. |
| Photobooth | Opens a photo capture with branded frames. |
| Agenda | Opens the event agenda. |
| Hover video preview | Auto-plays a small preview on hover. |
| Hover info box | Shows an info tooltip on hover. |
Per element you can set the following:
- Position / rotation / scale — where the hotspot sits in the room.
- Color / icon / intensity — the visual glow that marks the hotspot.
- Interaction radius — how close the visitor needs to walk to trigger.
- Action button text — the label on the interaction prompt.
- Camera offset — for cinematic zooms when the element is activated.
Save each element after editing. Order does not matter; elements do not overlap by position.
5. Audio tracks
Open the Audio tab inside the room builder to add ambient audio. Pick the file, set volume, playback rate, and whether it should loop and auto-start.
Multiple tracks are mixed client-side — use this for a soft background hum plus a short welcome-voice-over that plays once.
6. Publish
The room is live as soon as its Visible in filter flag is on and the masterdata's login rule allows the visitor. Share the public URL: {Base URL}/exhibition/{url-rewrite}.
7. Place the exhibition on a CMS page
The Exhibition Pagebuilder widget embeds the whole experience inside a regular CMS page. Add the widget to any page, set the Title, and the visitor sees the immersive room inline.
Full-screen exhibitions
For a full-viewport immersive page, place the widget in a single-column row without header, footer, or sidebars. The exhibition fills the available space.
Common issues
The 3D model does not appear. Check the 3D Modell field — it must reference a Media Manager item. Browsers also need WebGL; older Safari versions on iOS restrict large FBX files. Use GLTF for best compatibility.
Hotspot icons are invisible. The icon color matches the room's light setup. On dark rooms use light icon colors and vice versa. Increase Intensity if the hotspot gets lost in shadows.
Visitors get 403 on a room URL. The masterdata rule Login is required is Ja but the visitor is not logged in. Either lift the rule or redirect anonymous visitors to the login URL.
See also
- Pages & Pagebuilder — embed the widget on a page
- Media Manager — upload 3D models and 360 panoramas