
Use media in Widgets
Every Widget that displays an image, a gallery, a document, or a downloadable file picks the asset from the Media Manager. This page walks through the picker workflow — from a Widget field to the saved reference.
Prerequisite: The file already exists in the Media Manager. If not, start at Upload files.
Steps
1. Open the Widget's edit form
In the Pagebuilder, click the Widget. The Properties Panel on the right shows its fields. Fields that accept a file look like an image thumbnail with a placeholder icon.

2. Click the field to open the Media Manager
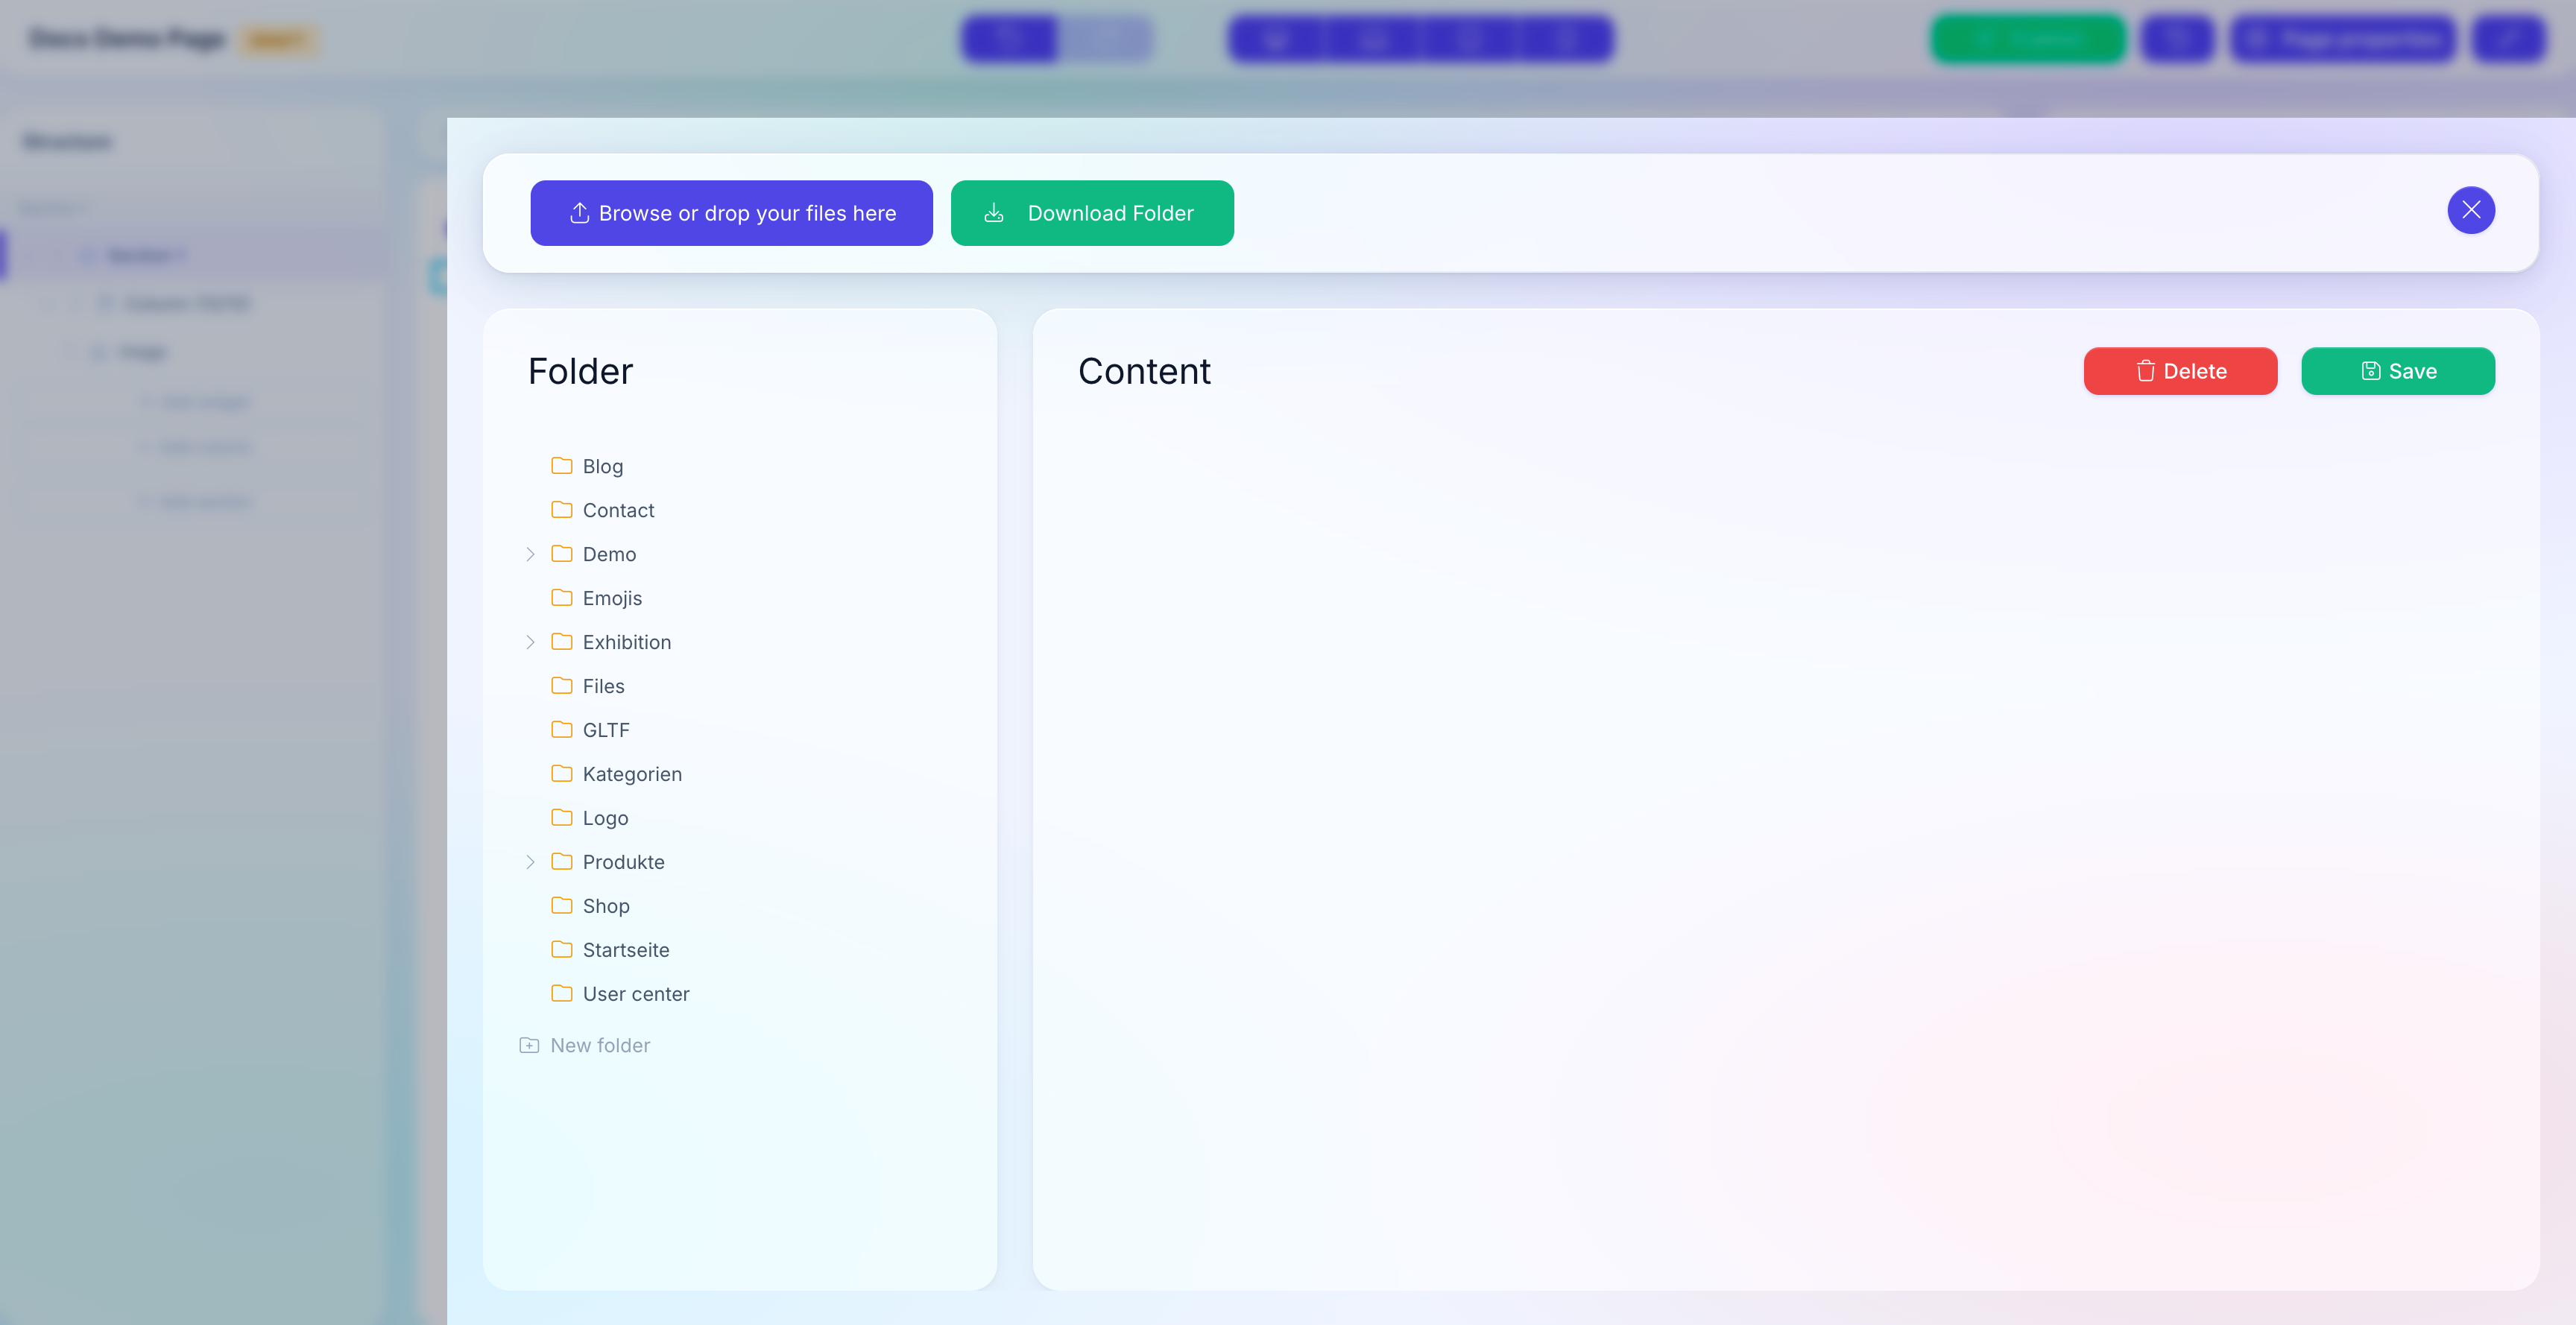
The Media Manager opens as a full-screen overlay. You see the familiar folder tree + file grid layout.
3. Select a file
Click a file thumbnail. The checkbox in the top-left corner ticks and the thumbnail gets a highlight border. Click again to deselect.
For a gallery or multi-file field (Image Gallery Widget, Multi-upload fields), select many files in one go by clicking each thumbnail. Use Shift+click to select a range and Ctrl+click / Cmd+click to add single files to the existing selection.
4. Click Save
The Save button at the top of the Media Manager confirms the selection. The overlay closes and the Widget field updates:
- Single-file field: shows the chosen file as a thumbnail.
- Gallery / multi-file field: shows a strip of thumbnails in the order you picked them.
The Widget now stores an array like [{"id":"321"}] (single) or [{"id":"321"},{"id":"322"}] (gallery) in its field. The Frontend resolves the ID to the current file path at render time — if you replace the file later, every page updates without re-saving the Widget.
5. Save the Widget
Click Save in the Widget's Properties Panel to persist the Widget itself. The Pagebuilder refreshes the preview with the new image.
Removing or swapping a file
To remove a file from a Widget field, click the small x overlay on the thumbnail in the Widget edit form. The field becomes empty; save to persist.
To swap a file, click the thumbnail again — the Media Manager opens with the current file already selected. Pick a different one and click Save.
Fields that use the Media Manager
Most common cases:
| Widget field type | What it stores |
|---|---|
| Single image / icon | One file ID. |
| Gallery | An ordered array of file IDs. |
| Document / download link | One file ID (PDF, VCF, etc.). |
| Background image | One file ID, rendered as a CSS background. |
| Video | One file ID (mp4, mov) or external URL. |
The Menu Editor also uses the Media Manager for item images (e.g. Mega Menu visuals).
Upload from inside the picker
If the file you want is not yet in the Media Manager, you can upload it without leaving the picker. The Upload button and the drop zone are available just as in the standalone Media Manager. After the upload, the new file appears in the grid; select it and click Save.
Gallery ordering
For gallery fields, the order you select the files in is the order they are rendered on the Frontend. If you want the files in a specific sequence:
- Pick them one by one in that sequence (do not use
Shift+clickrange selection — it does not guarantee order). - The Frontend renders them in the same order.
To reorder later, re-open the picker and re-select from scratch, or open the Gallery Widget's item list and drag-and-drop items.
See also
- Media Manager overview — folders, file types, permissions.
- Upload files — add new media.
- Pages & Pagebuilder — where Widgets are edited.