
Email Marketing forms and blacklist
Build a subscribe form, place it on a page through the newsletter Pagebuilder widget, and manage the suppression list that blocks unwanted addresses.
Prerequisite: At least one connection exists on the Connections tab. See Email Marketing.
1. Create a form
Open Pages → Email Marketing → Forms and click New Form. The modal is wider than the connection modal — it holds field configuration, consent text, and DOI settings.
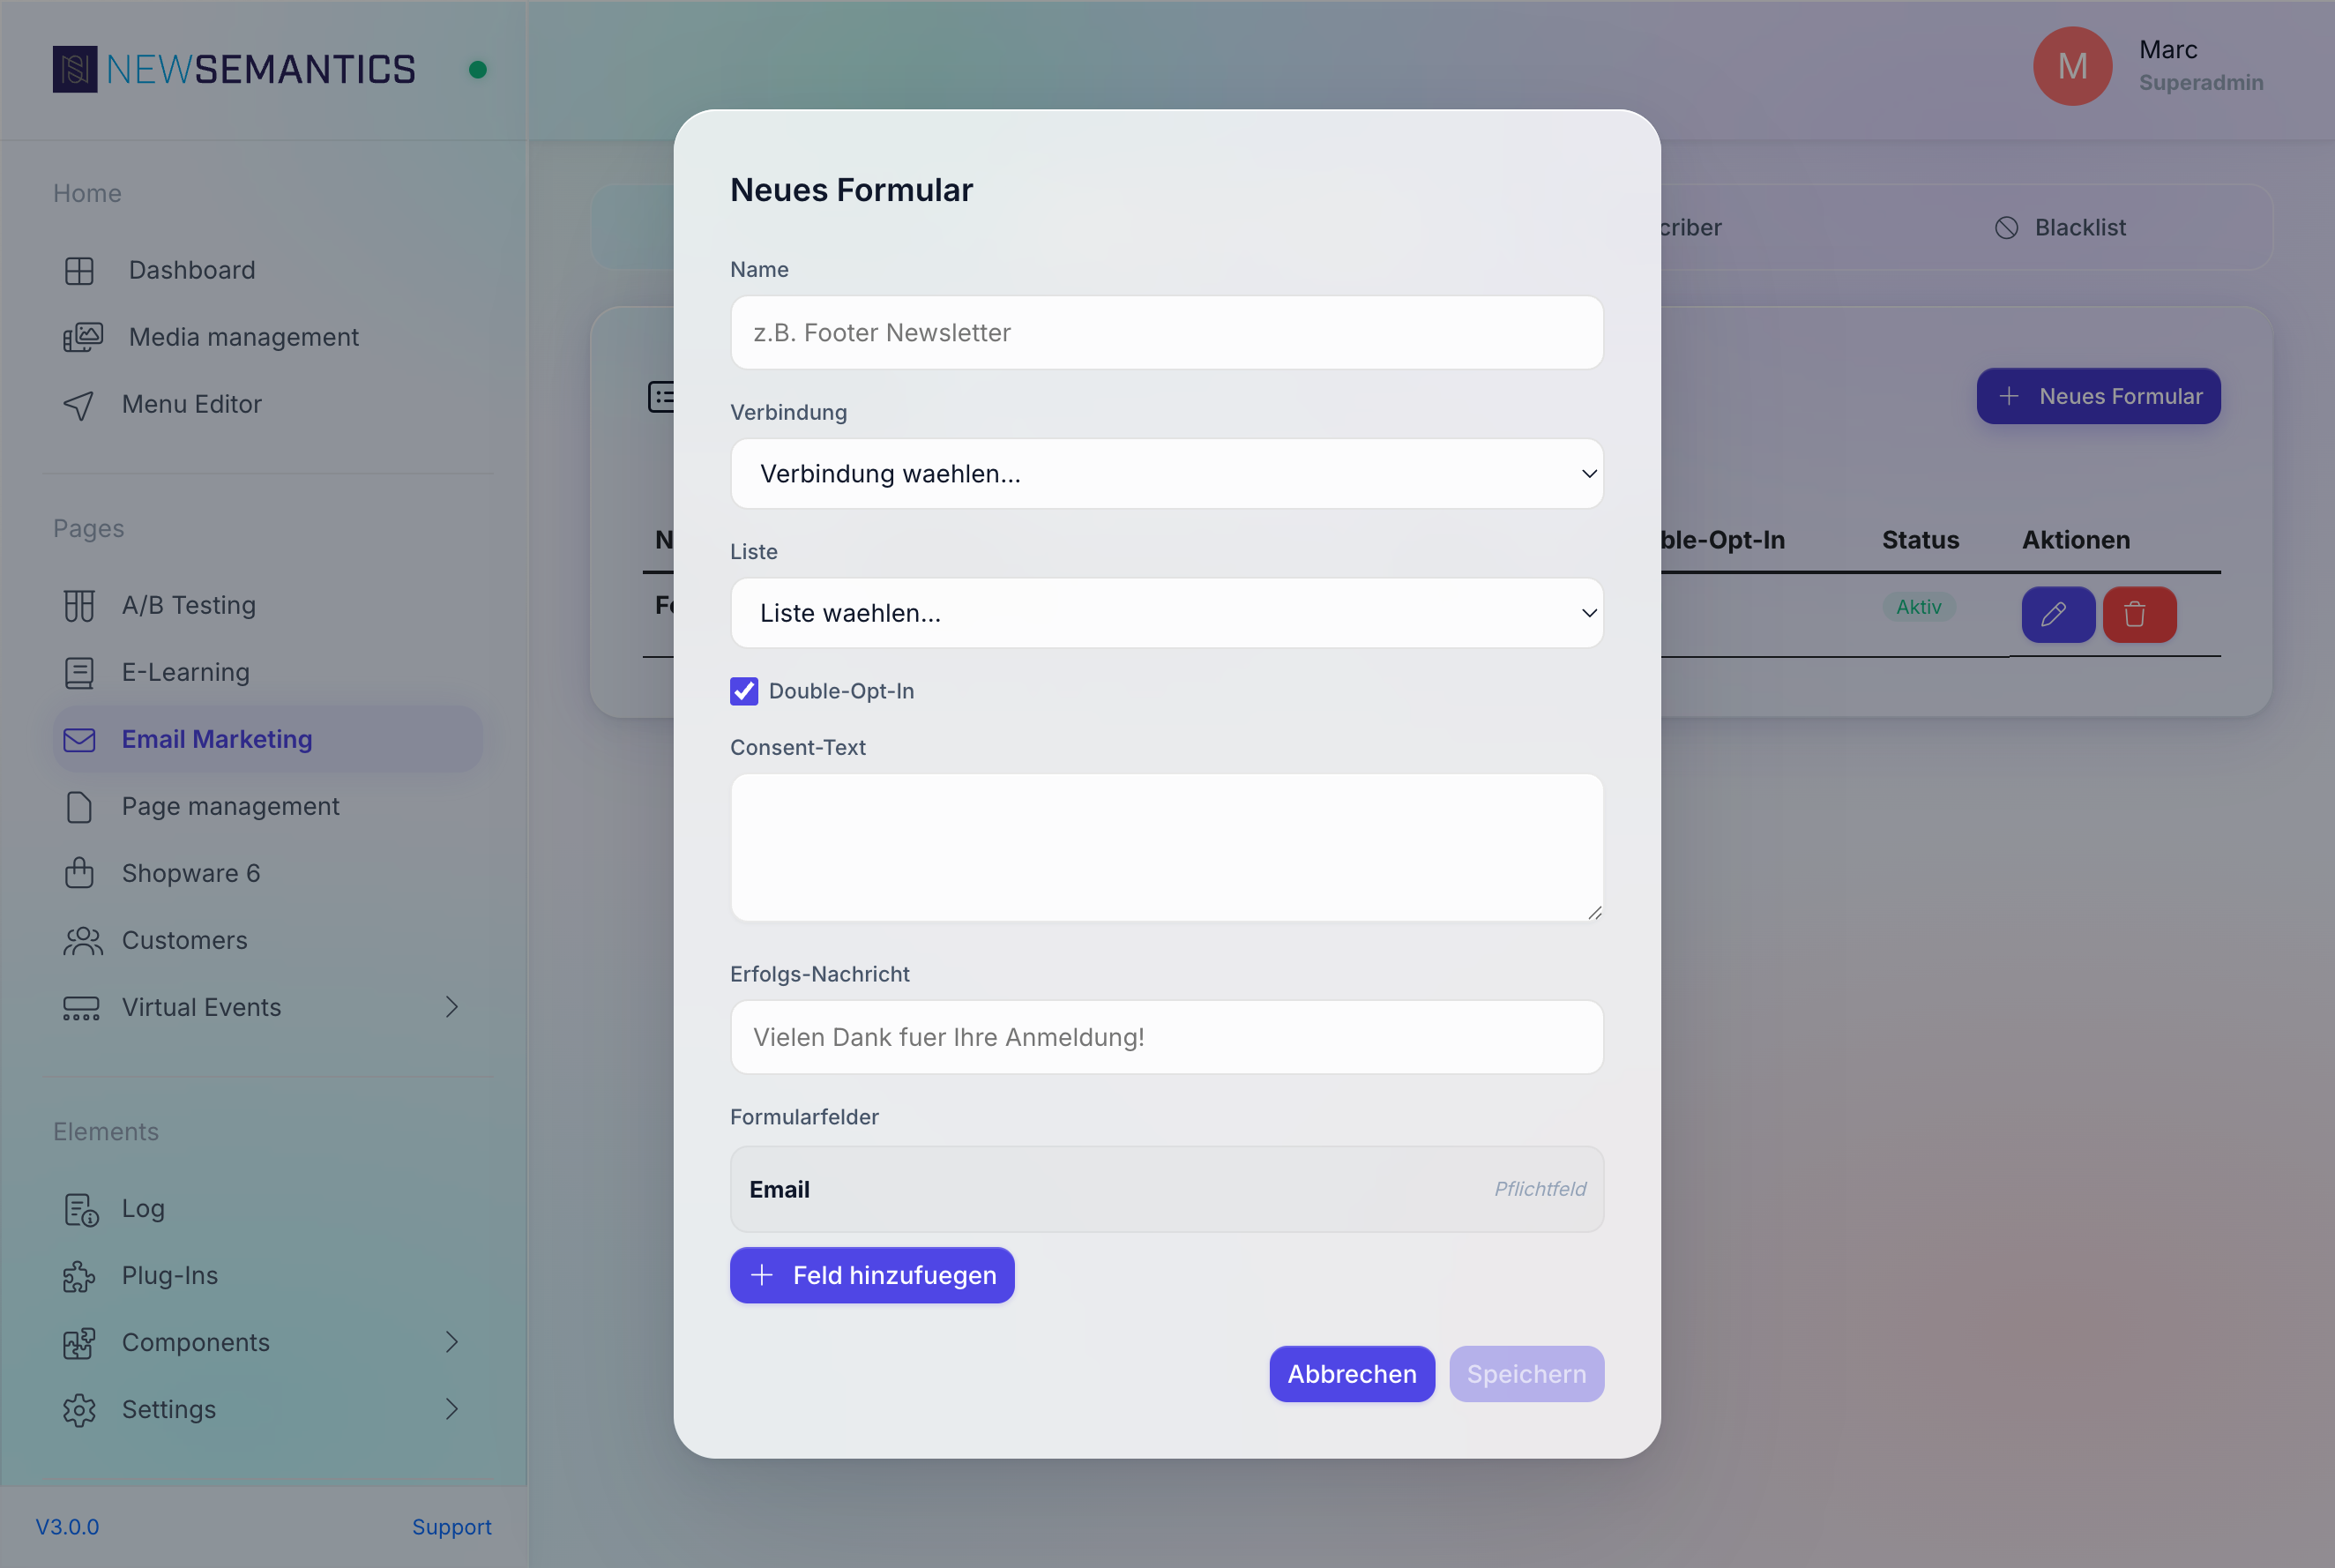
| Field | Purpose |
|---|---|
| Name | Internal label. Shown in the Pagebuilder's newsletter-widget selector. |
| Connection | Which provider connection this form uses. Once picked, the list dropdown fills. |
| List | Target list at the provider. |
| Double-Opt-In | Send a confirmation email before adding the subscriber. |
| Brevo DOI Template ID | Only visible when provider is Brevo and DOI is ticked. Paste the template ID from Brevo. |
| Consent text | The wording shown next to the GDPR consent checkbox on the public form. |
| Success message | Confirmation message shown after a successful subscribe. |
| Form fields | Extra fields beyond email. See below. |
Form fields
Every form has an Email field by default and it is required. Add more fields through Add field:
| Type | Maps to |
|---|---|
Text | Generic text field, passed as a custom attribute. |
First name | Provider-specific first-name field (FNAME / FIRSTNAME). |
Last name | Provider-specific last-name field (LNAME / LASTNAME). |
Custom | Arbitrary field — the label becomes the provider attribute key. |
Tick Required to make a field required on the public form. Use the trash icon to remove a field.
Keep forms short
Every required field reduces subscribes. Unless the list requires first/last name, the email field alone is enough.
Click Save. The form appears in the list and is available to the Pagebuilder newsletter widget.
2. Place the form on a page
Open the Pagebuilder for the page where you want the form. Add a newsletter widget. In the widget's settings select the form you just created under Select form. Save the page.
On the public site the form renders with your consent text, your success message, and the configured fields.
3. Test a subscription
Go to the public page, fill in a real address, and submit. The backend:
- Checks the Blacklist — if the address is there, it returns the generic success message but does not call the provider.
- Logs a consent entry in
em_consent_logwith the IP, user agent, and timestamp. - Calls the provider's subscribe endpoint. If DOI is on, the provider sends the confirmation mail.
For Brevo DOI: confirm the mail arrives with your chosen template. If the template ID is wrong, Brevo sends a generic placeholder — change Brevo DOI Template ID and re-test.
Public subscribe endpoint
The widget posts to /api/emailmarketing/subscribe. The endpoint is rate-limited at 5 requests per IP per hour and protected by a honeypot. You do not configure this — it runs without configuration.
4. Maintain the blacklist
Open the Blacklist tab. The suppression list blocks addresses before the provider is called.
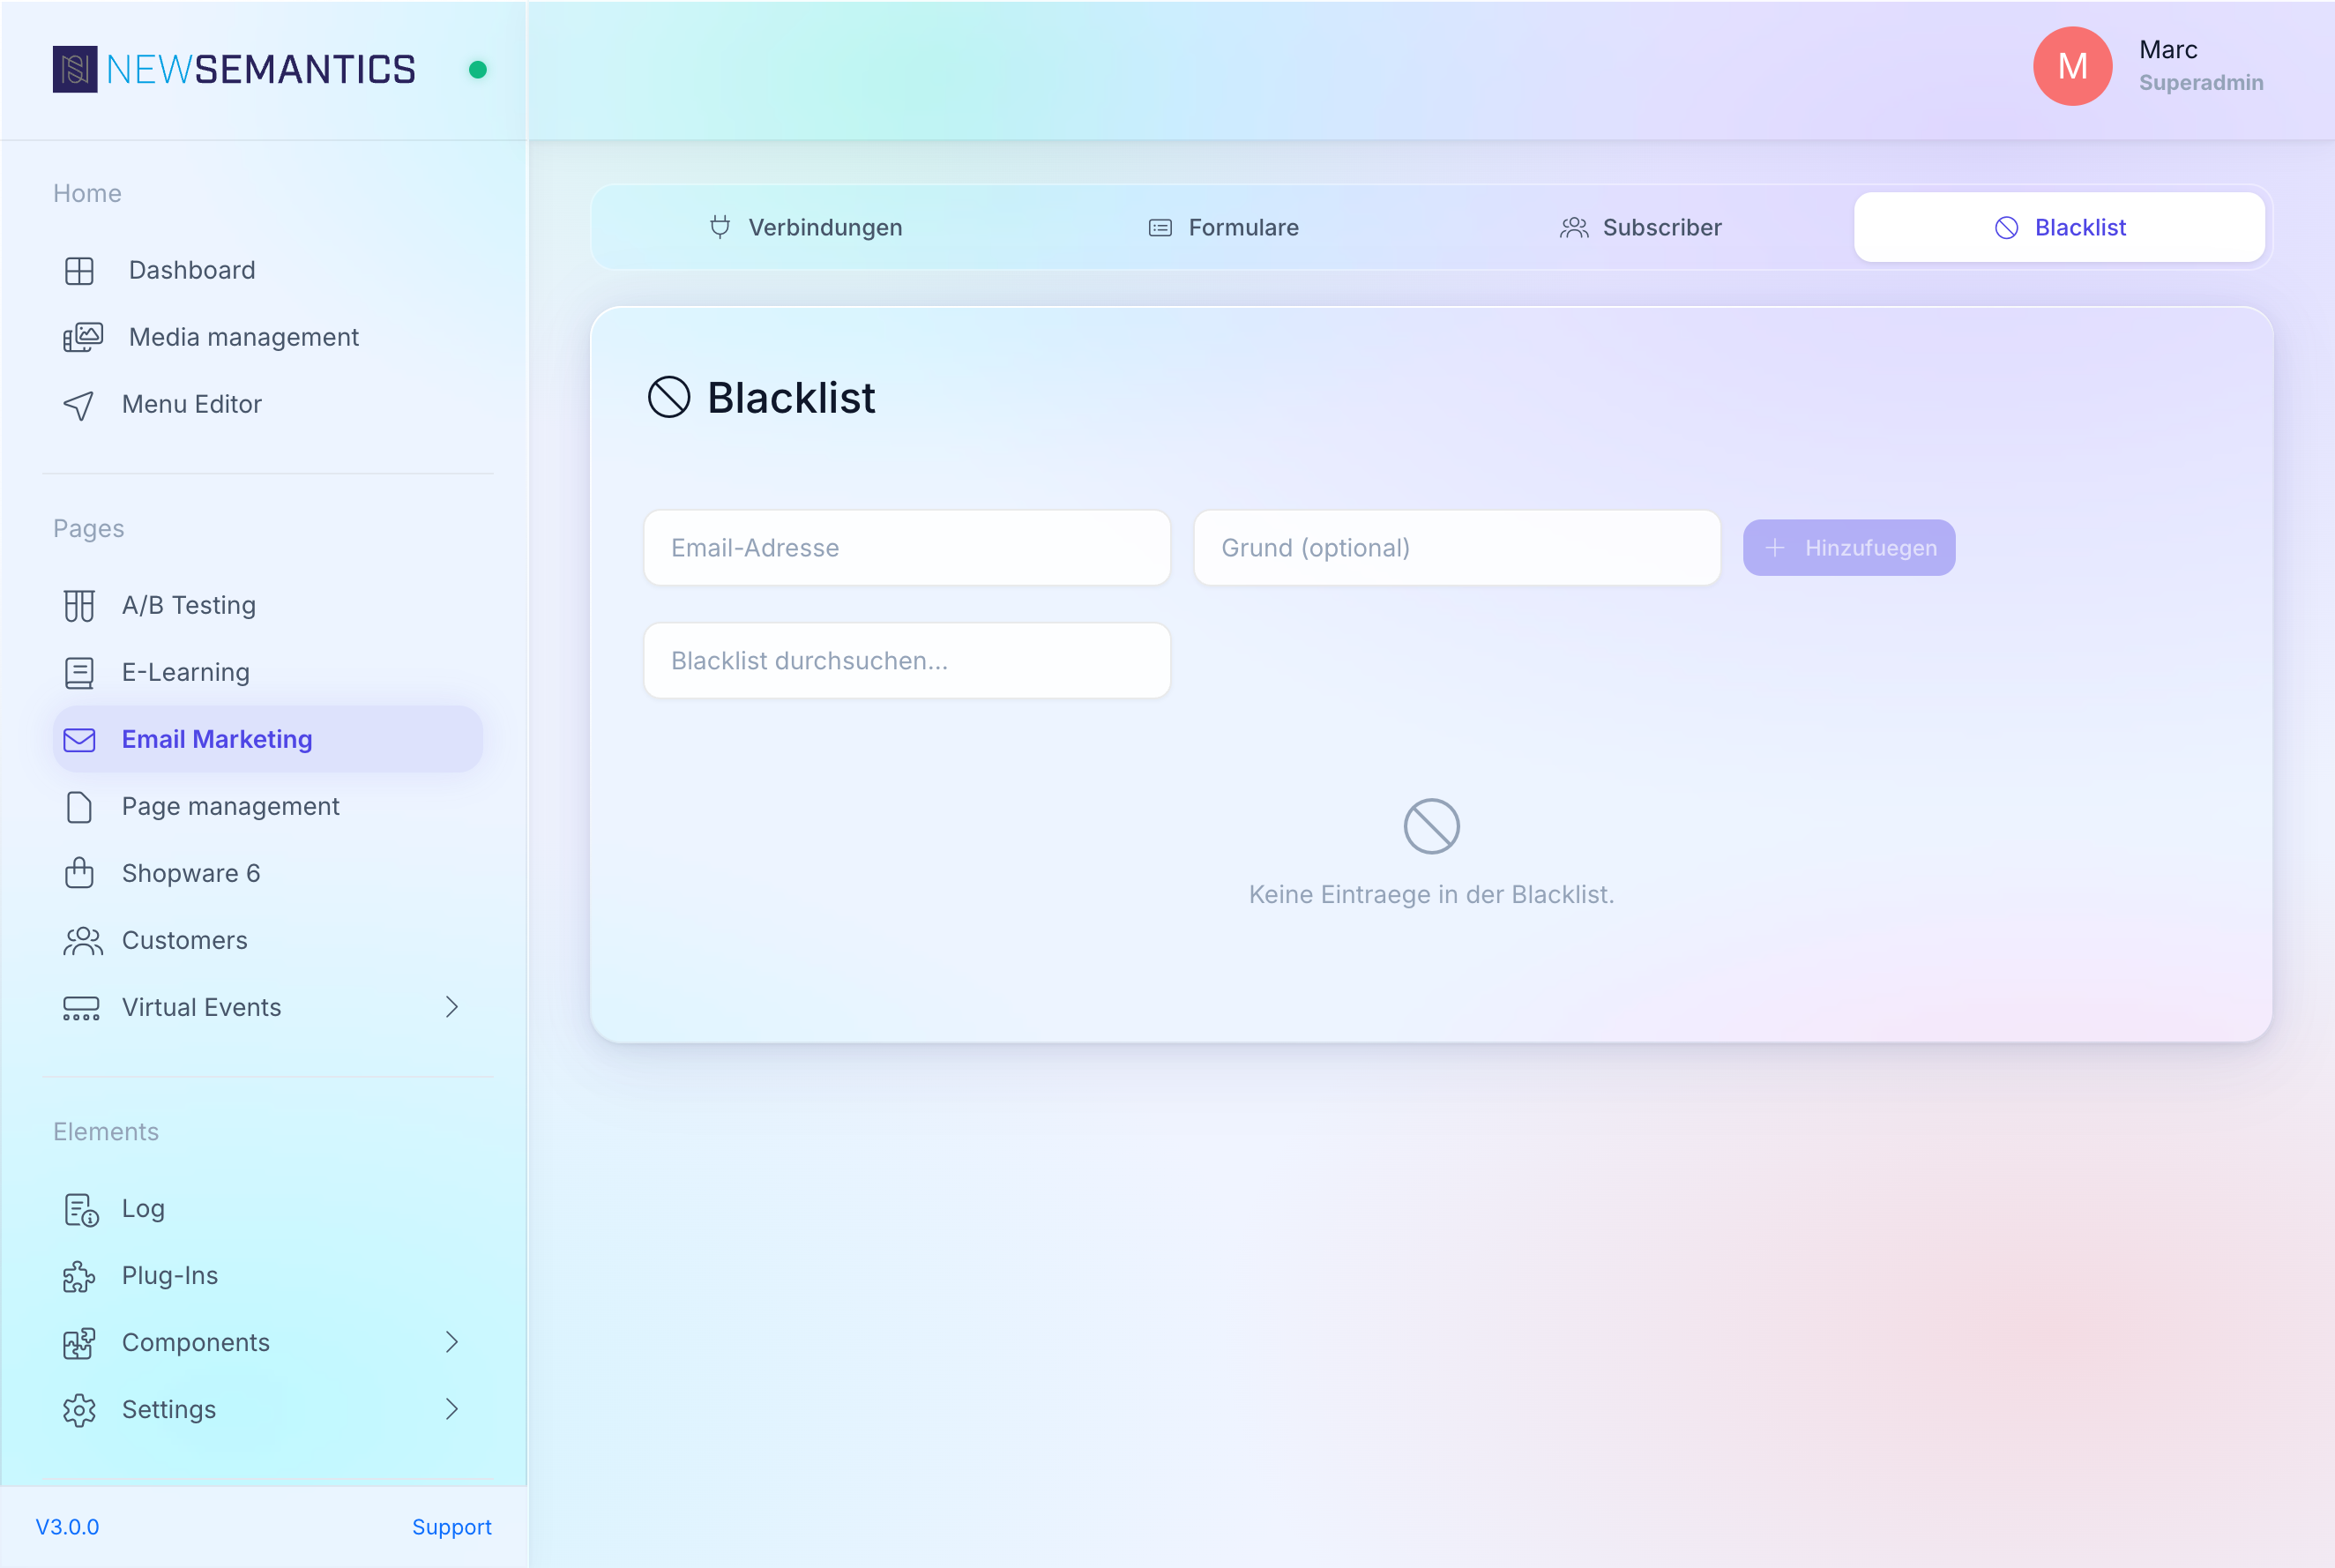
Add an address
- Type the email into the input.
- Optional: enter a reason (for audit trail).
- Click Add.
The address is rejected on every future subscribe — the public form still shows the success message so bots cannot probe the list.
Search and remove
Use the search box to filter. The trash icon removes an entry. Removing an address immediately re-enables subscriptions.
When to blacklist
- Hard bounces reported by the provider — avoid re-subscribing a dead address.
- Abuse complaints — the user reported a previous mail as spam.
- GDPR erasure requests — the user asked for their data to be removed. Keep the blacklist entry so they never end up on the list again.
The blacklist does not remove the address from the provider
The CMS only blocks new subscriptions. If the address is already subscribed at the provider, use the provider's own unsubscribe or delete flow.
5. Look up subscribers
The Subscribers tab is a read-only live view. Pick a connection and list, and the CMS queries up to 500 subscribers from the provider. Use it for quick spot-checks — not for bulk work.
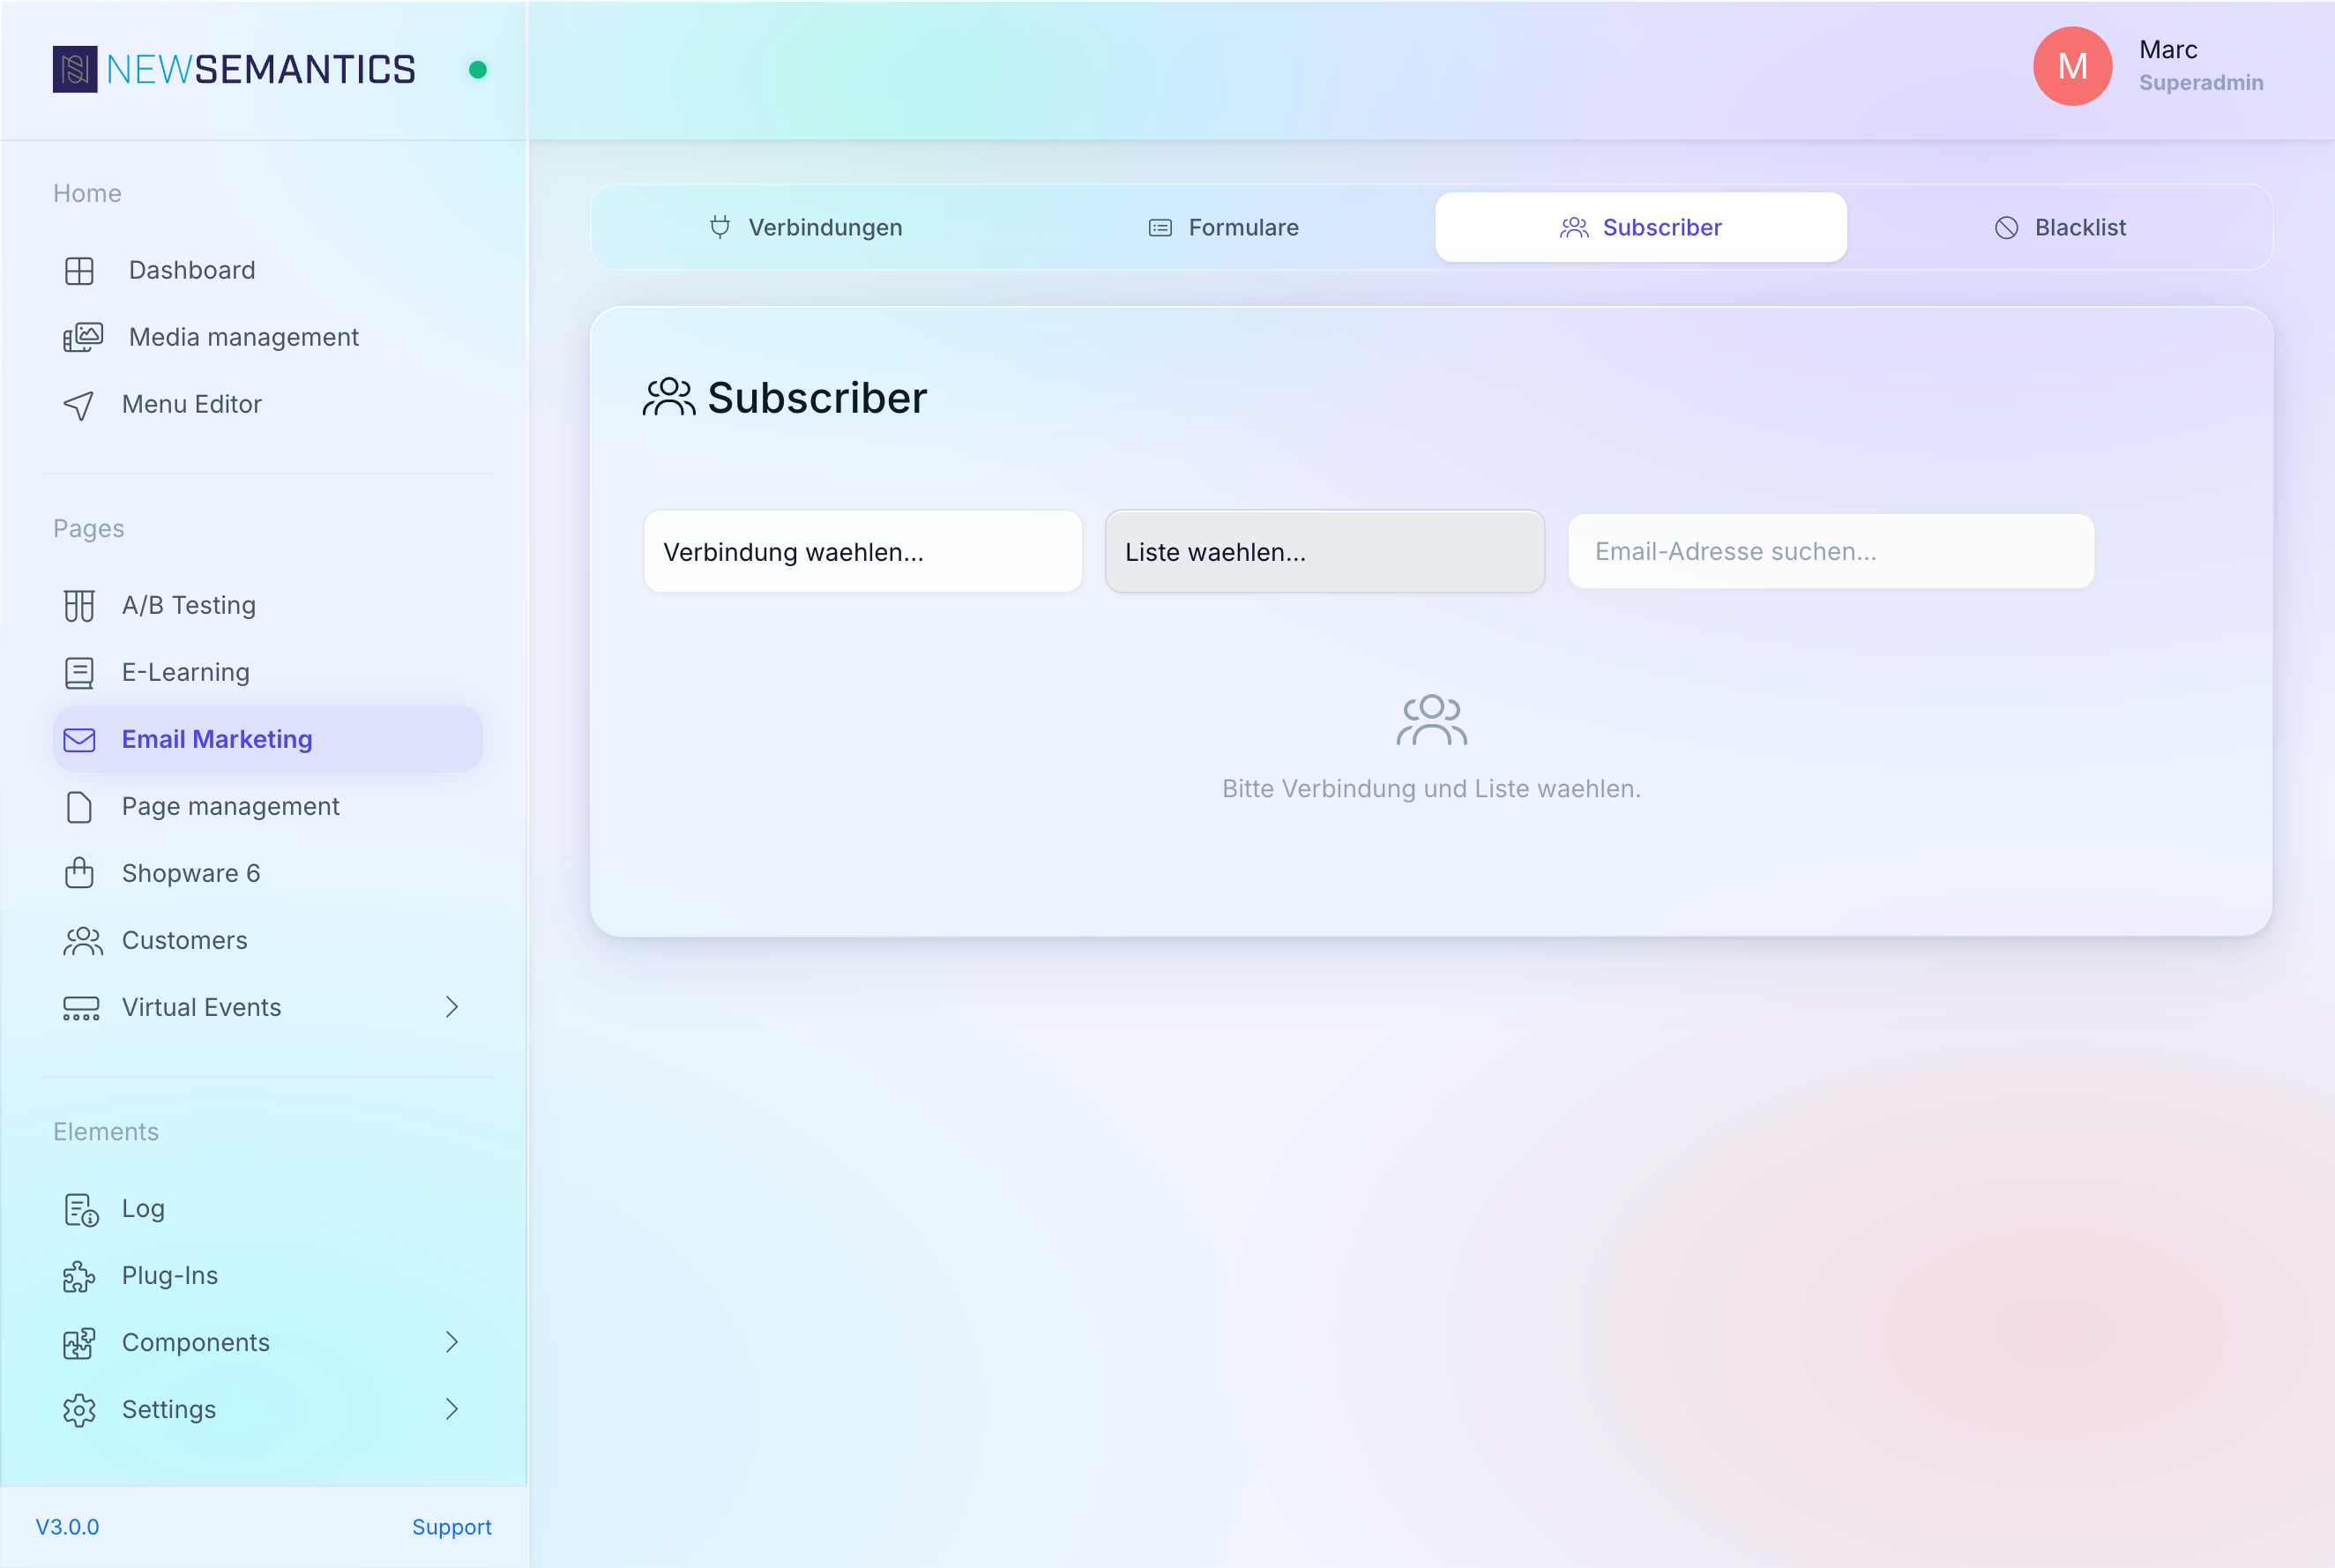
For bulk export go to the provider's own dashboard; the CMS has no bulk-export endpoint.
Common issues
The form shows success, but no subscriber appears at the provider. Check the blacklist first. If the address was blocked, the form still says "thank you" but no provider call happened.
Brevo DOI confirmation mail is blank.Brevo DOI Template ID is wrong or points to a deleted template. Open Brevo → Transactional → Templates and paste the correct ID.
Custom field ends up as the attribute key CUSTOM. Give the field a meaningful Name in the form builder. The label is used as the provider attribute name.
See also
- Email Marketing — connections
- Pages & Pagebuilder — how to place the newsletter widget